
Postcards for the New Year 2020, made by yourself in different performance techniques, breathed life into the old tradition. To make simple options do not need special skills, but for complex ones, you will have to learn something.
Paper Cards 3-D
Realizing the idea of a New Year card as a gift for 2020 in 3-D will help quilling techniques, origami, the use of velvet paper or large decor. Let's assemble a volume composition with our own hands from available materials.
Velvet paper
For a card stylized as Santa Claus you will need:
- cardboard for children's creativity 1 pc.;
- velvet paper of red, black, white and yellow, 1 pc.;
- black buttons 2 pcs.;
- cotton cosmetic sponges 1 pc.;
- PVA glue with a narrow nose;
- scissors.
How to make cards for the New Year 2020 in the style of a Santa costume:
- A4 sheet of cardboard folded in half. We draw along the fold several times so that the postcard takes the given shape.
- On the front side we “collect” Santa's outfit.
- We glue the front part with red velvet paper. From velvet white paper, cut a strip, glue it in the center from the bottom up.
- We form a girdle: cut out a strip of black paper with a length equal to the width of the postcard. Glue across.
- On yellow velvet paper, draw a square equal to the width of the black girdle. In the middle of the square we enter the second smaller square. Carefully cut it and glue it over the girdle, imitate the belt buckle.
- Glue the buttons one higher than the belt, the other below.
- Fold the sponge in half, cut it with scissors. Glue on top of the postcard like a turn-down collar.
- Inside we write a wish or paste a printed finished text. If you use beautiful stylized fonts, it will turn out even more beautiful.

Quilling
Quilling is based on the assembly of figures and patterns from twisted multi-colored or plain paper. For paintings in this technique, double-sided colored paper is suitable. We cut it into strips of different lengths, and we will twist it with a pen or pencil. To get volume spirals of an angular shape, we’ll take the details with our fingers to the table.
For the correct layout, it is convenient to use template blanks that can only be filled with multi-colored spirals. Christmas card ready. You can pick up any template and fill it with folded colored paper blanks.

Scrapbooking
Scrapbooking-style postcards surprise the recipient so much that it is hard to suspect that this is the result of hand-made creativity, not a purchased present. The hardest thing to think about is an idea. But when you have a decent option at hand, it becomes much easier to realize the idea. We will make two versions of cards using the scrapbooking technique.
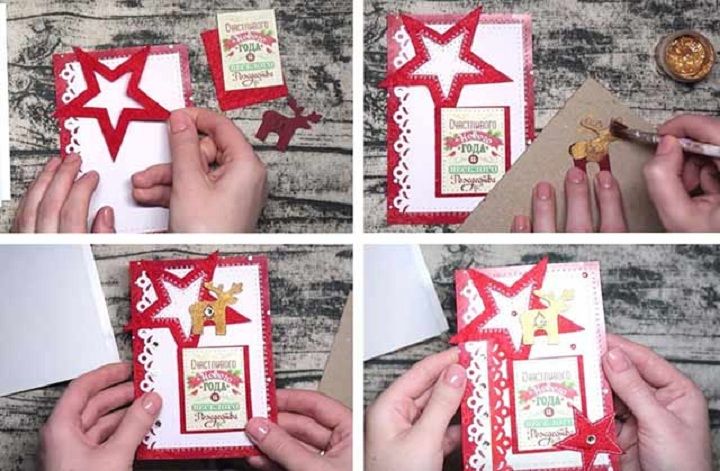
Prepare for the first master class:
- A4 paper for watercolor 2 pcs.;
- scissors;
- gold sparkles;
- brush;
- decorative cardboard;
- stationery knife;
- printed greetings ready;
- cardboard blank of a five-pointed star;
- PVA glue;
- rhinestones, beads, sequins;
- red felt or velvet paper.
Create a postcard:
- From one sheet of A4 format you get two cards. Fold the sheet in half, cut. Each half is folded again in half.
- We print out a congratulation of a suitable size or write and draw it by hand.
- The stub of the star is circled on felt, cut out. In the middle of the star we draw the second one, cut through, but do not throw it out, it is suitable for decoration.
- We cut a deer from a piece of cardboard, cover it with a layer of glue and pour gold spangles on top. Leave to dry.
- On white paper and red felt we draw the same ornaments, cut it with a clerical knife. Overlay the details as shown in the photo.
- We collect parts of the card, superimposing levels on top of each other.
The second version of the card using the scrapbook technique will require even less effort. It can be repeated with the child. Prepare:
- A4 white thick landscape paper 1 pc.;
- red felt or velvet paper 1 pc.;
- white lace 10-15 cm long;
- pearls of small diameter 1.5-2 mm, if you can find the halves of beads even more convenient;
- pencil;
- scissors;
- silver braid 7-9 cm long;
- red acrylic paints;
- paint brush;
- PVA glue for paper and fabric and Dragon for beads.
Instructions for creating a New Year's card:
- Fold the album sheet in half. Cut, half fold again. Get the rectangle, which will be the first blank.
- Glue the square of felt in the center. Glue white lace in the middle of the fabric. Along the perimeter, paint the workpiece with red acrylic paint.
- While the paint is drying, we make the second workpiece 2 mm smaller than the first. In the center of the second workpiece, draw a circle and carefully cut it.
- Glue the workpiece with a cut circle. Now through it the "Christmas ball" is visible. On the edge of the circle with Dragon glue we fix the beads. Add the pearls in the corners of the upper workpiece.
- Add the thread for the ball from the silver braid. Glue the front blank to the second half of the folded sheet, we get a double-leaf Christmas card.

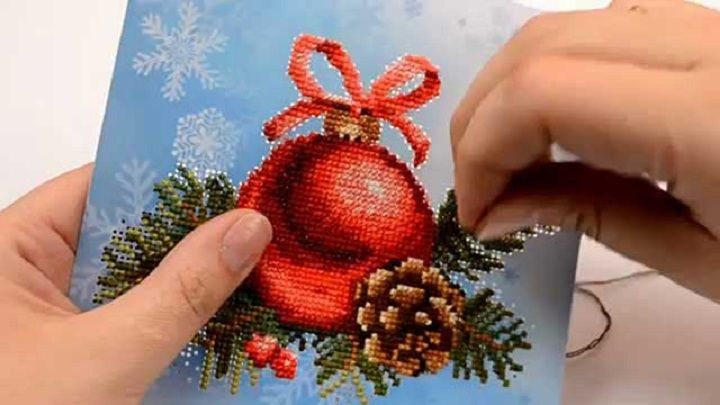
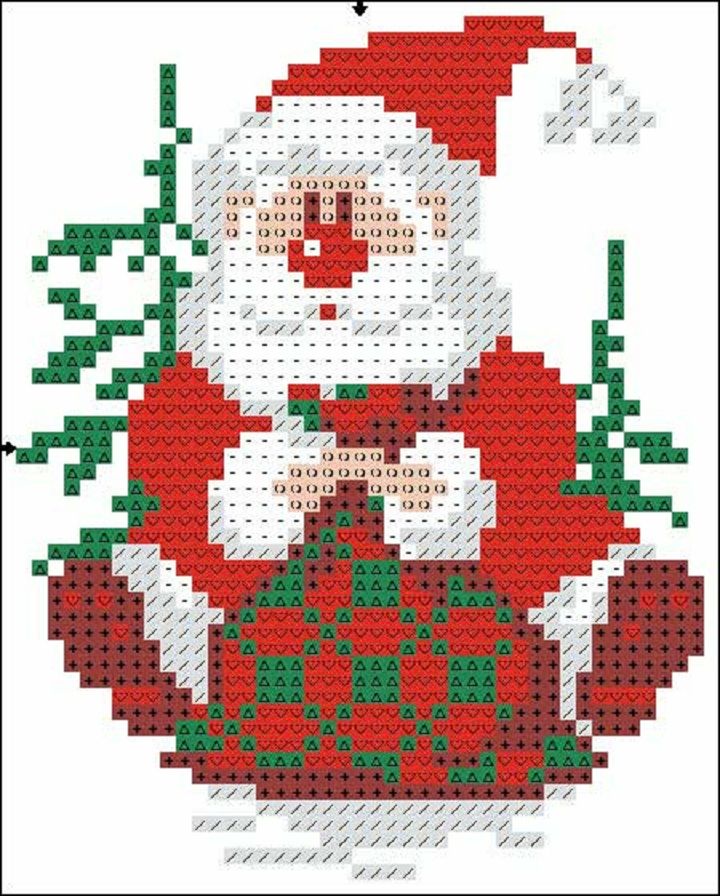
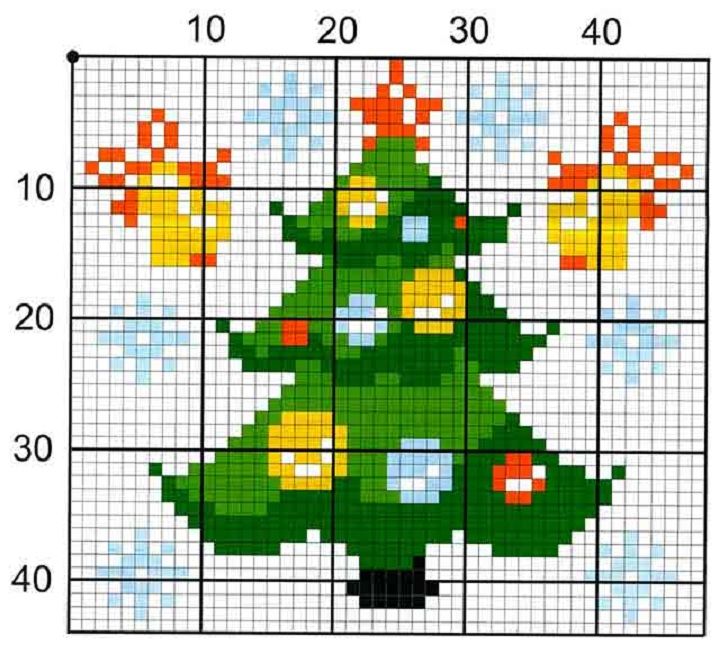
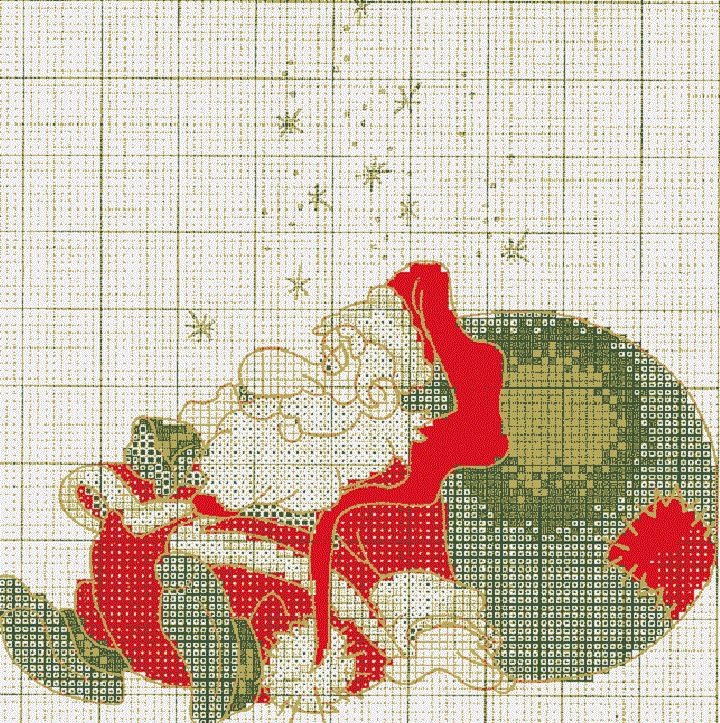
Embroidered postcards
To make embroidered cards, it is useful to master the minimum practice of sewing and sewing stitches. Tackling complex multicomponent circuits without experience is not worth it. The work may seem too laborious and completely discourage the desire to master embroidery.
If you have experience embroidering, you can take on such options for a New Year's card: Christmas ball, Santa Claus, bells, candles, chimes, a snowman. Any New Year's symbolism can become the object of an embroidered picture-card. When making a presentation in a frame, he will be able to take his rightful place on the recipient's wall or desktop.
Materials for work when creating an embroidered card:
- threads for embroidery in suitable colors: floss, acrylic, silk, iris;
- needle;
- canvas fabric made specifically for cross-stitch;
- hoop;
- scissors;
- additional decor according to the plan: buttons, beads, serpentine, cotton;
- embroidery pattern.
We wash the finished work before final decoration in warm water with a mild soap for hands. So that the threads do not lose brightness, fix the colors. For this:
- In 200 ml of warm water we pour 8-12 g of 9% table vinegar, stir.
- Dip the fabric in the mixture for 1-3 minutes.
- We take out, wring out and spread for drying.
- Iron the fabric with embroidery with an iron in medium mode through gauze.
- We cut off the excess fabric, glue it to the cardboard and place it in a frame or arrange a traditional greeting card with congratulations and good wishes.

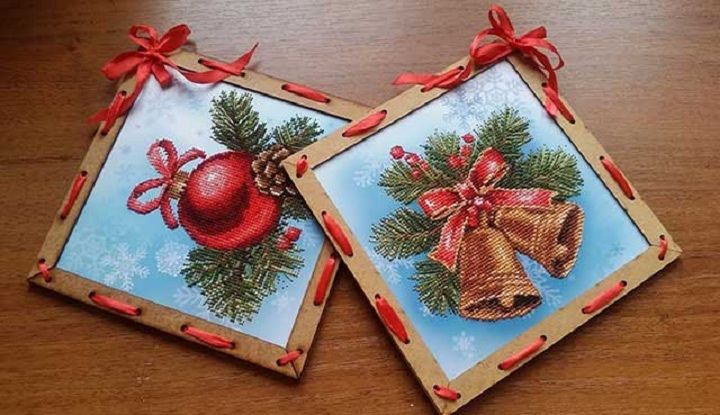
According to the schemes, you can embroider any thematic pattern.
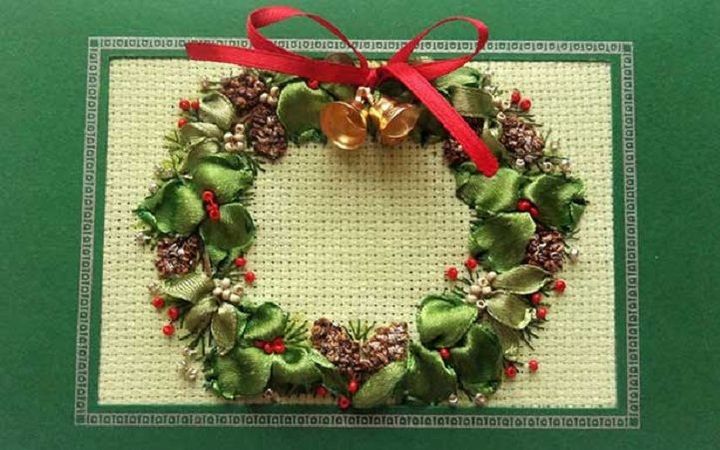
Beautiful cards are obtained using the technique of embroidery with satin ribbons. But a decent development will also take time.
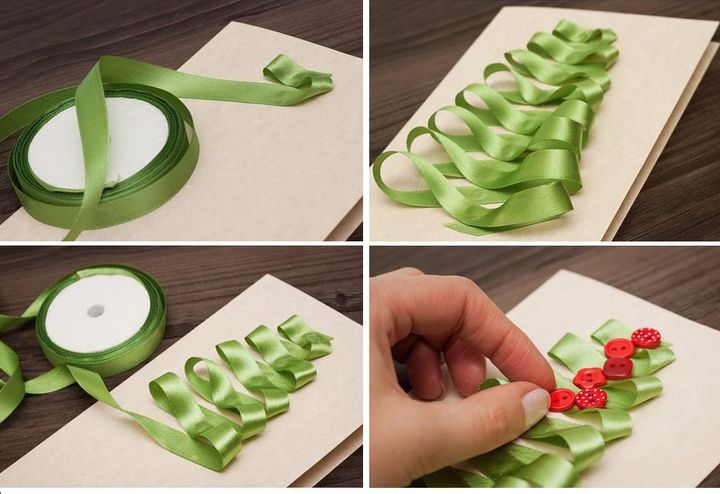
And if you don’t embroider, but just stick a satin ribbon, it turns out no worse. You will need: a white sheet, a satin ribbon of green color, glue and several colored buttons.
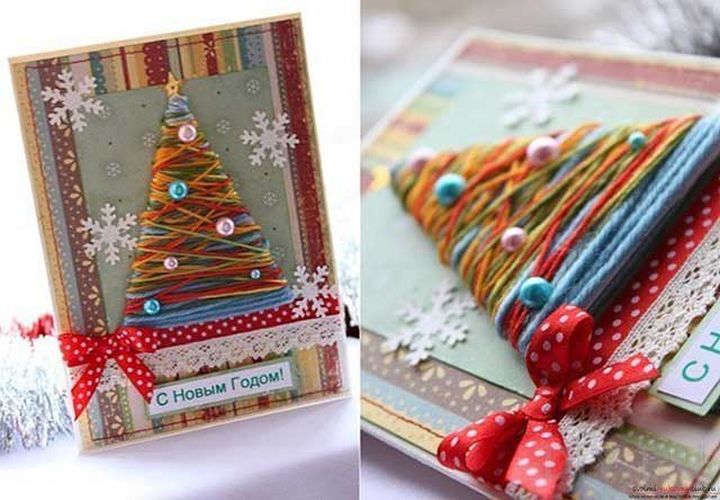
The easiest option resembling embroidery stitching will be the tightening of a cardboard figure. Instruction:
- From thick cardboard we cut out the triangle frame of the future Christmas tree.
- Multi-colored woolen threads tightly wrap the workpiece.
- Using glue gun we glue the beads to the threads.
- We attach the Christmas tree to the cardboard base of the future card, decorated in random order: colored paper, themed pattern, pencil drawing or fabric.
- We decorate the card with textile or paper snowflakes, satin ribbons, braid and lace bows.
- In the middle, we write the text by hand or glue the printed one.
- On the outer front side, glue the thematic inscription “Happy New Year” or “Merry Christmas”.
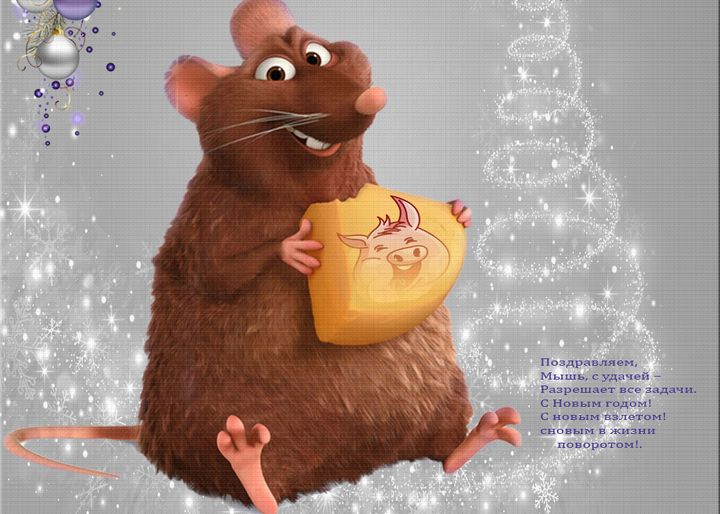
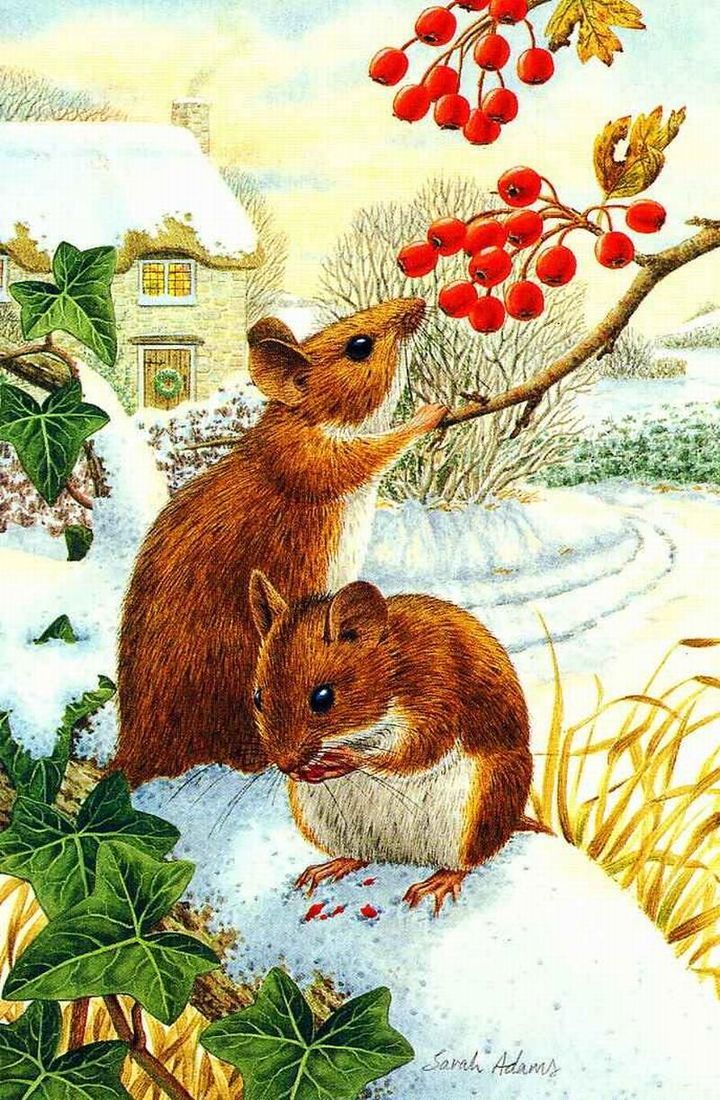
In order not to ignore the totem of 2020. You can make several New Year's cards with the image of the Rat.For this, ready-made pictures on the Internet are suitable, but you can draw a mouse with your own hands in paints and brushes.

How to make DIY cards for the New Year 2020: video
Read also:
- Cabinet decoration for the New Year 2020
- Window decoration for the New Year 2020
- DIY 2020 New Year Posters
 (No ratings yet)