Content
Very soon, the kind and hospitable Boar will resign, passing the reins to the next animal from the 12-year cycle. The time has come to provide family and friends with the symbols of 2020 - funny and funny DIY Rats. Such crafts will be valued above all, not only because they are exclusive and filled with warm energy.
The rat is known for its frugality, it does not disappear in vain. Having turned the old stocks of scraps, paper or plasticine into a charming hand made, needlewomen will surely please the sacred rodent, and he, in turn, will take care of the well-being of his admirers.
Eco-friendly figurine
A small rat made of gray yarn can decorate the desktop and the refrigerator, it will well "take root" in the nursery or on the windowsill. A similar symbol of 2020 with their own hands easily made by schoolchildren. A minimum of effort, and the result exceeds all expectations. Toys made of yarn or jute today are just at the height of fashion. If desired, it costs nothing to equip the figure with a ribbon loop and decorate it with a Christmas tree.
You will need:
- gray wool yarn;
- wine cork or a piece of polystyrene foam, with a density of at least 35 kg / m³;
- jute twine;
- Crystal Moment glue or thermal gun;
- copper or floristic wire, 1.5 mm thick;
- pins with a decorative head.
Sequencing:
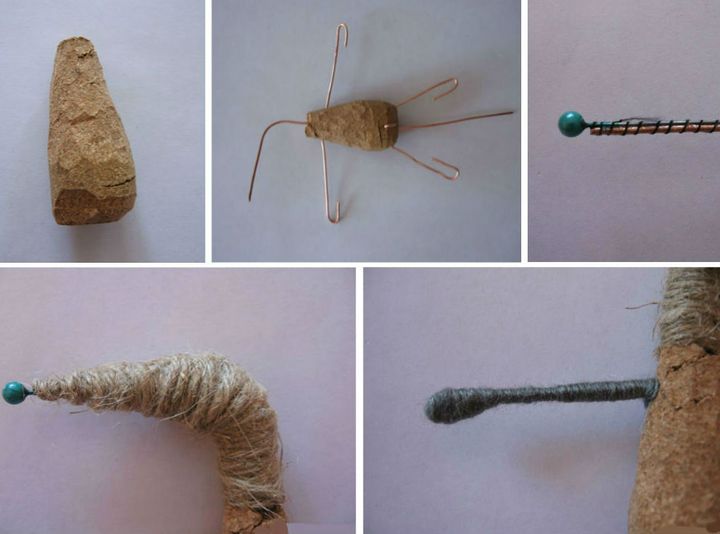
- From the cork or polystyrene, we cut out the body of the rodent, giving it a conical shape.
- We make a wire base for the front and hind legs, head and tail. Gently pierce the cork, inserting the necessary blanks, and try to move them less so that the body does not crumble. We bend the ends of the wire on the legs - we get brushes and feet.
- We wind the nose-pin with a thread to the wire frame. For reliability, drip glue on top.
- We form the head of the rat from jute twine. We coat each of its layers with glue. We make a smooth transition from the neck to the torso and from the round crown to the sharp nose.
- Wrap the paws and tail with gray yarn in several layers until a visually suitable thickness is obtained.
- Throughout the length of the thread should not lie down equally. Somewhere the layer will be thicker, somewhere, for example, at the end of the tail - a little thinner.
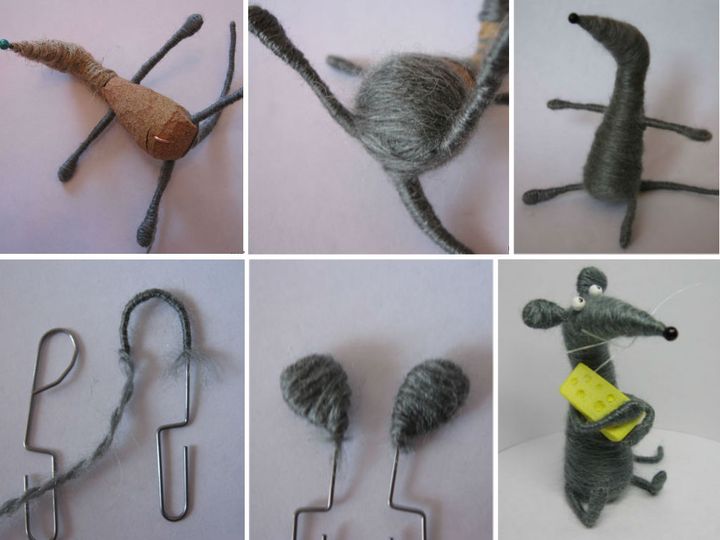
- Then we proceed to decorate the body and head with yarn. We always glue the base with glue so that the threads do not move during operation.
- Ears are made from paper clips. They will need to be opened, as shown in the photo and use only the upper part. We cut off the unnecessary fragments, leaving a piece of about 5 mm to attach the ear to the head.
- Eyes can either be bought ready-made at a scrapbooking store, or made from the same pins as the nose. For a mustache use a fishing line, several times flashing her toy. Cheese is made from plastic clay, salt dough or a piece of colored eraser, in which holes are scrolled.
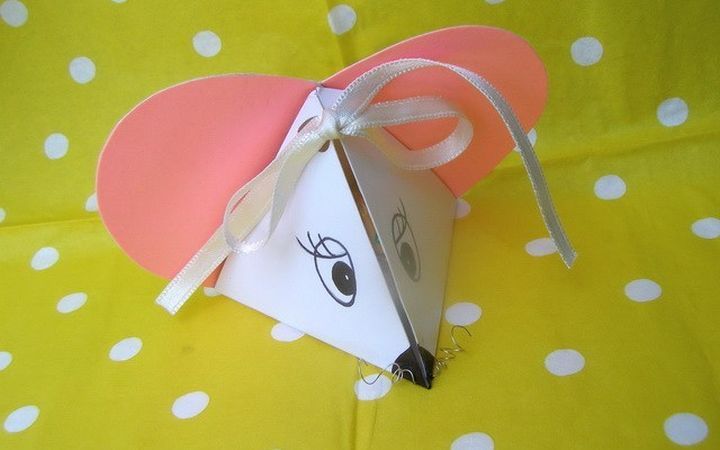
Gift box "Mouse"
This is an excellent packaging for mini-surprises that it is so pleasant to indulge in those around during the winter holidays. Guests need to give some cute souvenir as a keepsake, just for such cases, packing boxes are intended. Their size can be varied as necessary.
You will need:
- a sheet of white thick cardboard;
- pink designer cardboard or pastel paper (both have a beautiful convex texture);
- scissors, glue, felt-tip pen or artificial eyes for toys.
On a sheet of cardboard (on the back) we draw an equilateral triangle. To do this, first draw a segment, 14 cm long - this is the base of the figure. Divide it in half and draw up a perpendicular, 12 cm high. Connect all the vertices of the triangle. Next, on each side we find the middle. Draw a small triangle with its vertex down in a large one, with its vertex up. We draw the figure “ears”, as shown in the photo:
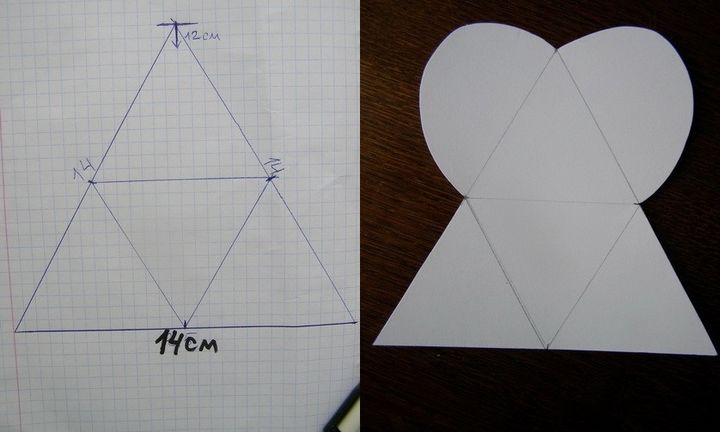
With scissors or a non-sharp knife, draw along all sides of the box, slightly pushing them through. It is necessary that they bend better. We begin to fold the toy. We bend two sides along the inner faces, and then the upper part with ears. From the designer cardboard we cut 2 pink semicircles.
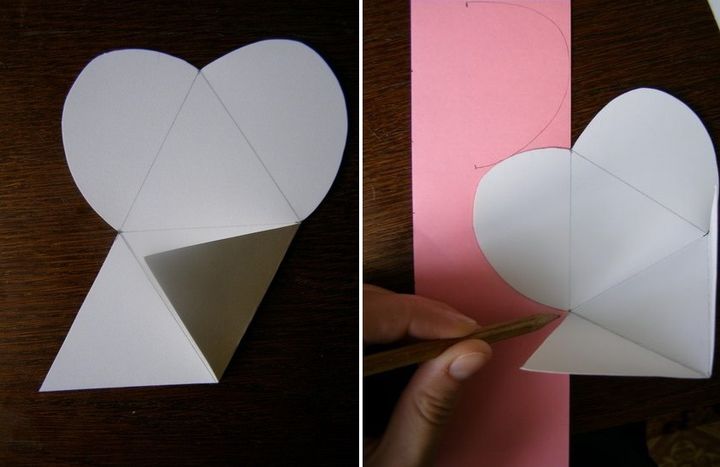
Turn the pattern over. In the inner corners of the sides, draw a nozzle symmetrically. We pierce it with a needle and thread a silver wire. On the same sidewalls we either draw or paste eyes.
We wind the wire on any round rod - we get an extravagant mustache. On the inside of the ears we glue pink semicircles. We cut a curly hole in the upper corner above each eye along the heart.
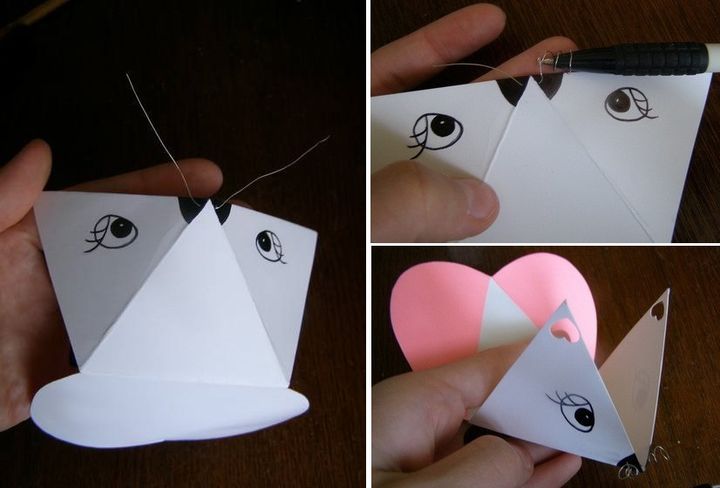
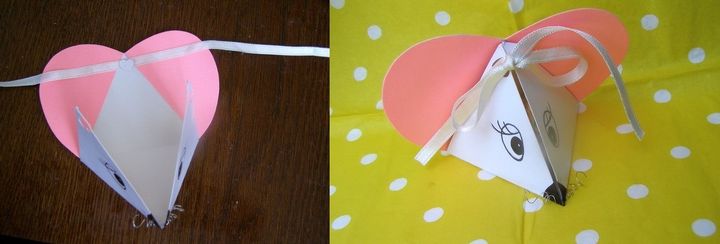
Between the ears we glue a satin ribbon, 0.5 cm wide. We pass its ends into the hearts-holes. We tie a bow. A cute “Rat” box made by yourself is waiting for a gift to be hidden in it.
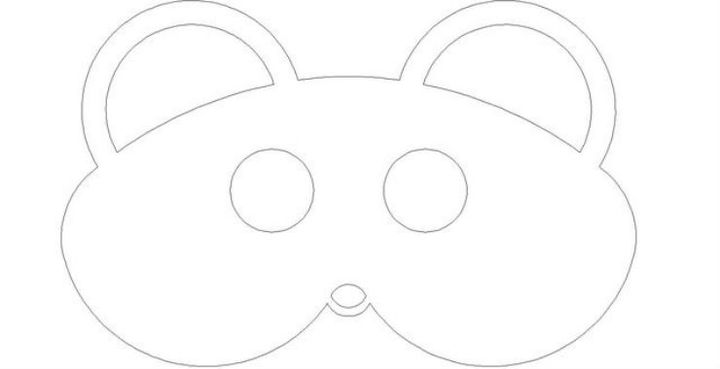
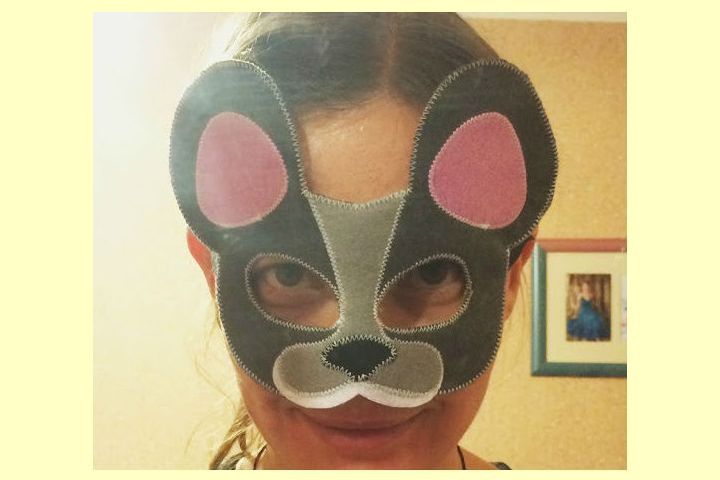
Mask from felt for a children's party
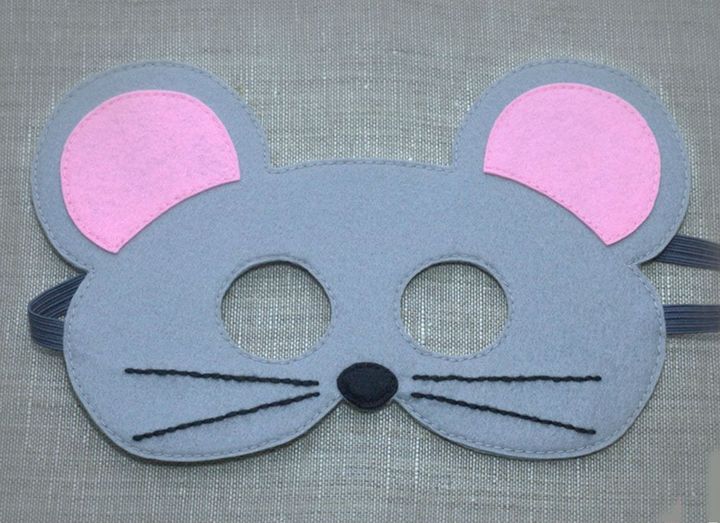
The mouse costume is the perfect choice for this year's children's carnival. It will not be difficult for a needlewoman mother to sew a vest and trousers from gray fleece or plush, and add a comfortable felt mask to them. You can make the whole kit in a couple of hours. The mask will require no more than 30 minutes.
As a basis, you can take the template proposed in the workshop.
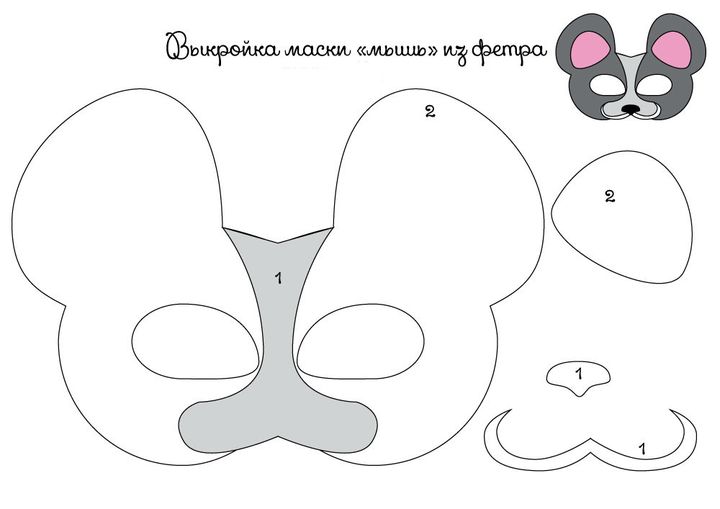
Should be prepared:
- 2 details of gray felt muzzle;
- 2 details of ears, pink;
- black nose, 1 pc.;
- an elastic band for the color of the hair of the child.
We connect both parts of the muzzle with the wrong sides inward, on the sides we put the ends of the gum. We grind, retreating from the edge by 2 mm. Attach the inner part of the ears and nose. We stick a mustache of black yarn.
You can sprinkle the mask with a New Year’s glitter spray.
Option for older children
For high school girls, too simple carnival masks are no longer interesting. Therefore, you will have to make a little more effort and do something very elegant and flirty. With a similar mask, mom will not refuse to show off at a corporate party or a friendly party.
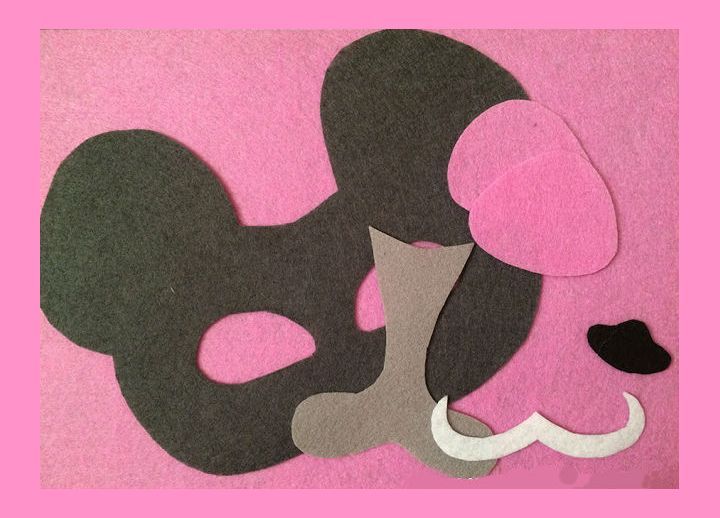
The product is sewn according to the same pattern, only not from 3, but from 5 parts of different colors. A light nose and mustache pads give the mask visibility to the volume.
All details are stitched together with a zigzag seam using contrasting thread. This adds a special charm and piquancy to the product.
Funny polymer clay rat
Those who managed to get acquainted with such wonderful material as plastic will definitely want to make a 2020 talisman out of it with their own hands. It is worth involving children over 8 years of age in the process - polymer clay is considered environmentally friendly and easy to sculpt.
You will need:
- plastic;
- knife or medical scalpel;
- Stacks
- rolling pin.
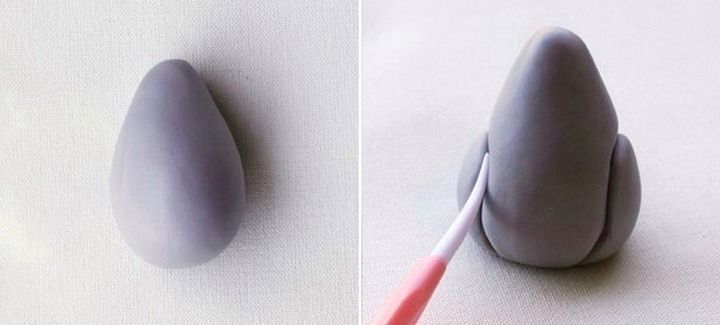
Roll up a ball of gray clay, then slightly extend it to form an egg. We put it on the table, wide part down and slightly flatten, for stability. Stack with a sharp end, cut through the sides of the semicircle of the lower legs, which the little rat bent at the knees.
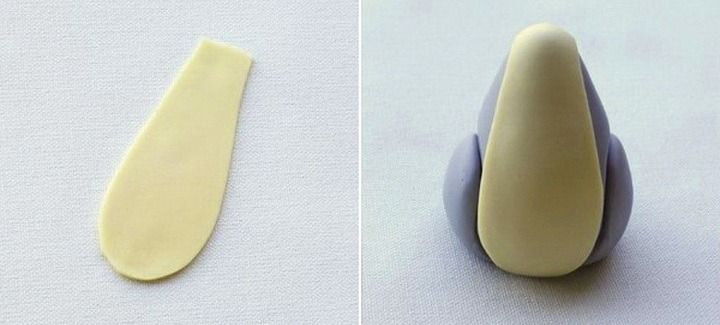
We roll out a slice of cream-colored clay with a thin layer, stretching it in length. Glue on the body in the form of a shirt shirt.
Creamy plastic is also required for the paws of the animal. They are made as follows: first we roll up small balls, then flatten them with your finger, forming our hands and feet. At the end, using a knife or a scalpel (you can take a thick, so-called "gypsy" needle), we push individual fingers. Handles look like this:
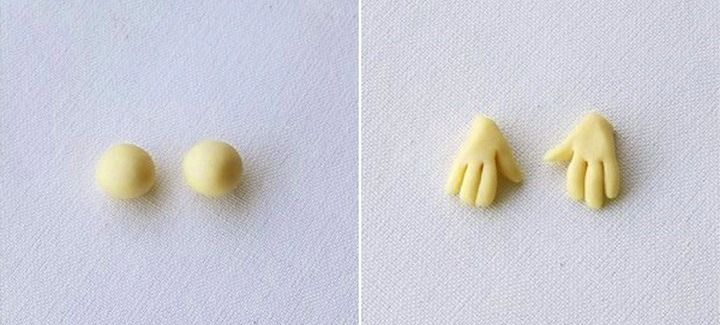
And the feet are slightly different:
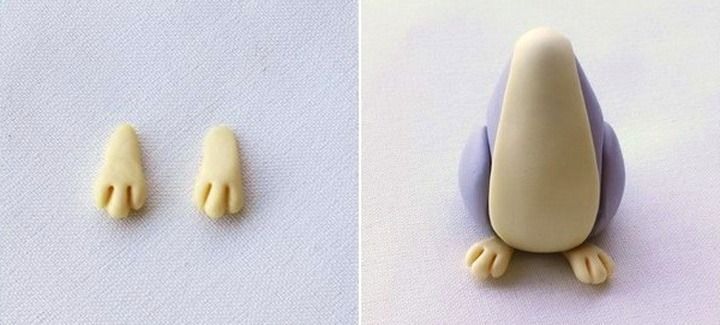
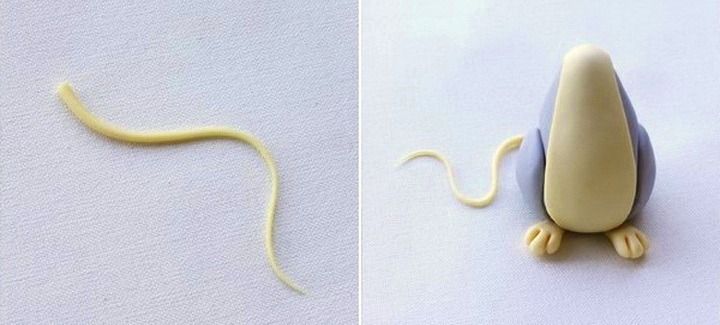
We make a tail, gradually thinning the “sausage” from clay. We take care of a beautiful bend and an impressive length.
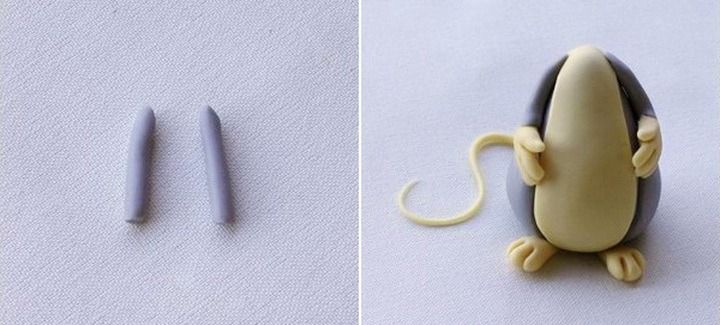
For the upper legs, we roll out two narrow cylinders, which will be located on the sides of the body. We attach the palms to them.
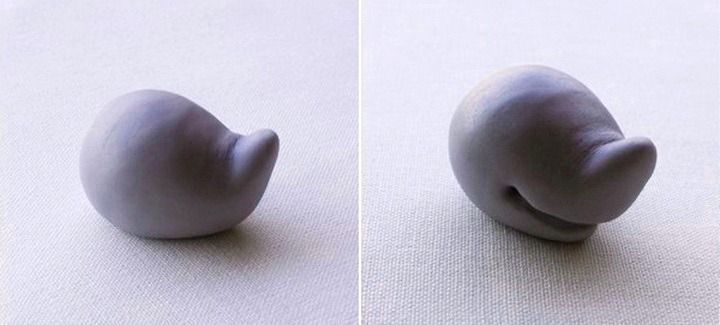
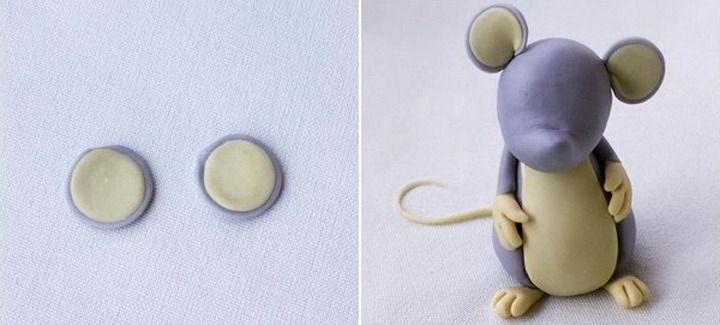
The most difficult element of any figure is the head. We form it from the ball, gradually pulling it into a characteristic rat nose. Gently pushing, we get a fold that gives the muzzle the little rat a smiling look. We open the mouth of the toy using the stack.
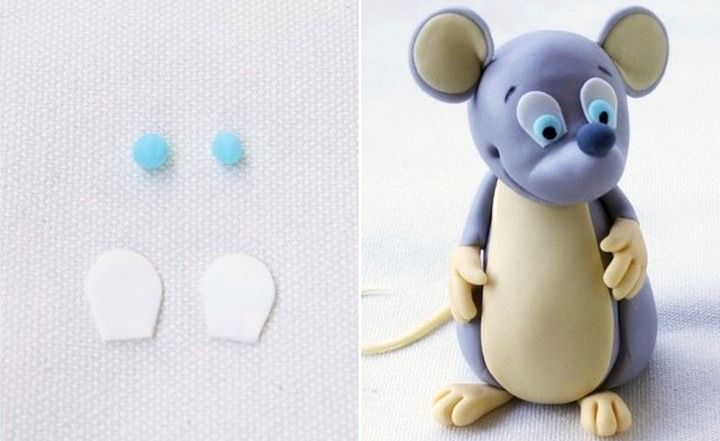
We fasten the head to the body under a slight slope, so that the figure seemed more lively. We make ears from clay of 2 colors: gray and cream. We roll up balls of a larger and smaller size, and then “walk” on them with a rolling pin, getting smooth, thin circles. Glue the blanks on top of each other, slightly twist and fasten to the head.
Do the same with the eyes. They will need clay in 3 shades: white, blue and black. Having fixed the eyes on the muzzle, we make a rat nose and draw eyebrows with a thin needle.
The finished product is sent to the oven. The temperature and duration of baking polymer clay differ from different manufacturers, so you need to clarify what parameters are indicated on the package.
In addition, the symbol of 2020 - a rat can be made with his own hands from fabric, cones, acorns, vegetables with a long tail and so on. An interesting option is the decoupage of Christmas balls with the image of a rodent, embroidery, painting kitchen utensils. Fantasy is limitless and there is still time to bring all creative ideas to life.
How to sew a funny mouse with big ears: video
Read also:
- Modular origami with a rat for the New Year 2020
- How to draw a rat for the New Year 2020
- Cross stitch pattern for Rat - symbol of 2020
 (1 ratings, average: 5,00 out of 5)