Content
Before the New Year 2020, I want to decorate the house with my own hands. Purchased toys are also suitable for this, but how much more interesting it is to embody the ideas of your favorite children or your own. One has only to try to do one thing, and then imagination and fantasy are played out for all members of the family.
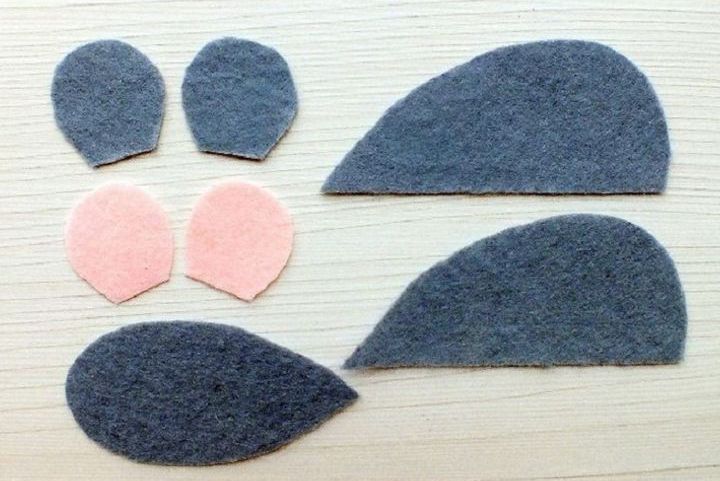
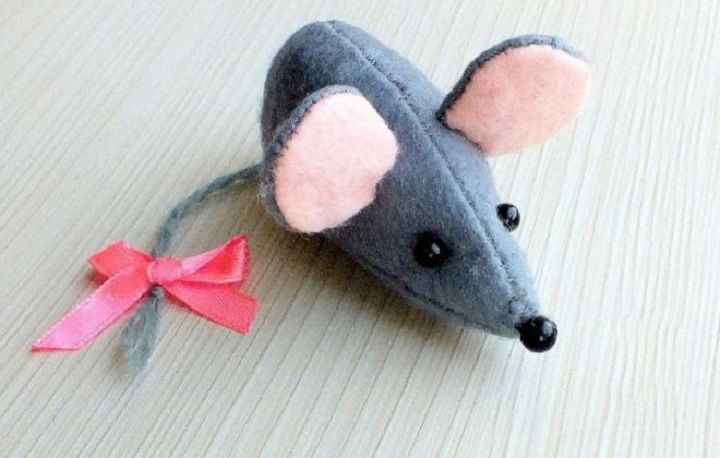
Felt mouse
In 2020, according to the eastern horoscope, the year of the Metallic White Rat begins. Showcases are full of colorful mice and cute rats. But how do you want something unusual, creative, made by yourself. We sew the felt symbol of the year with a simple step-by-step instruction. For the manufacture we prepare:
- felt gray and pink;
- red or pink ribbon;
- 3 large black beads for nose and eyes;
- non-sterile medical cotton;
- lace in tone of gray felt;
- paper for drawing patterns;
- pencil;
- scissors;
- tailor pins - needles with a knob-limiter;
- a needle;
- threads to match the fabric.
Step-by-step instructions for sewing the symbol of the year 2020 - Mice:
- On paper we draw blanks for the body and ears. We draw in one copy, and we will cut two pieces from the fabric. Cut the paper blank with scissors.

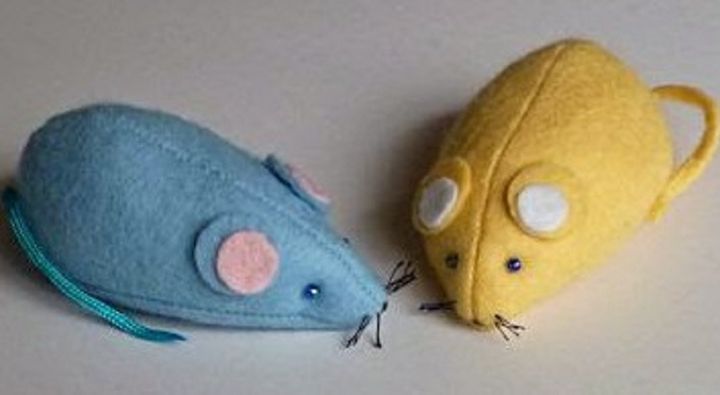
- Apply to the wrong side of the felt and outline with a small or piece of soap. If the mouse is large, then pin the paper blank to the fabric with tailor pins for a secure fit. So it will be more convenient to outline and cut. The number of blanks is shown in the photo. 4 on the ears and 3 on the body. Teardrop-shaped blank is the tummy.
- Sew the body from the wrong side with threads in tone of felt. Initially, the dorsal part. To her bottom hem part of the tummy. Sew the tail crocheted or use a piece of lace. We stuff with cotton or synthetic winterizer.

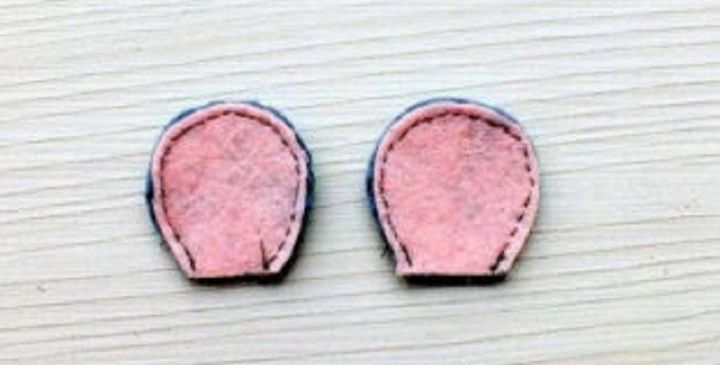
- For the ears we use details of pink and gray. Sew from the inside. We stuff slightly with cotton so that the seams do not spill.
- Sew on beads eyes and nose. Tie a red bow on the tail - the symbol of the year is ready.
- If you use other colors of felt and slightly round the side parts of the body, you will get more well-fed mice. The ears of such animals are glued with PVA glue, and not stitched. Experiment with the children.
Christmas angel
Decorating a Christmas tree is also possible not only with purchased toys, it is much more interesting to make them with your own hands or to watch how they are made under the competent guidance of kids. The presented option is so simple that it can be performed even with three-year-old children. Prepare:
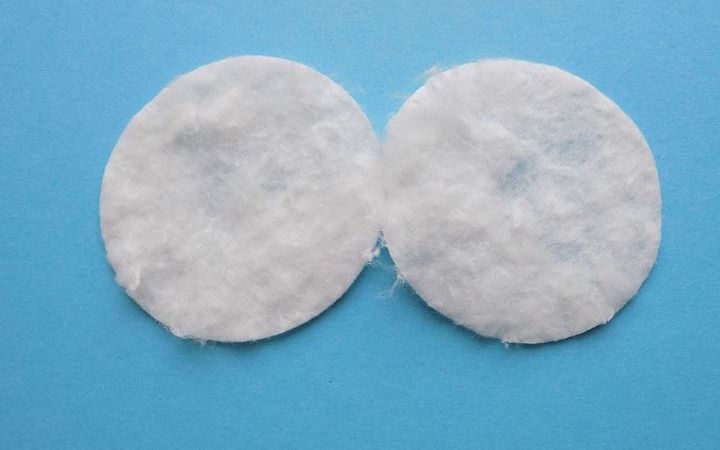
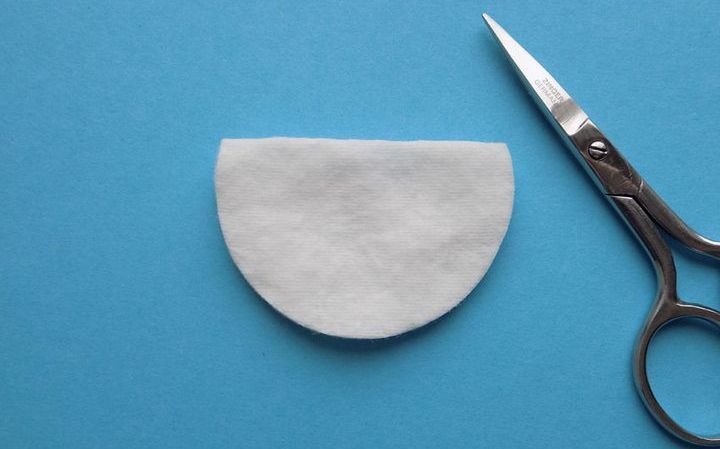
- cotton cosmetic sponges 3 pcs. for one angel;
- scissors;
- needle and white thread;
- shiny threads: gold or silver;
- if there are no threads, instead of them brilliant paint and a thin brush;
- wooden skewers;
- scissors;
- sequins in tone of paint or threads;
- PVA glue.
Stages of the implementation of the idea of the Angel:
- We divide one cotton sponge in half.
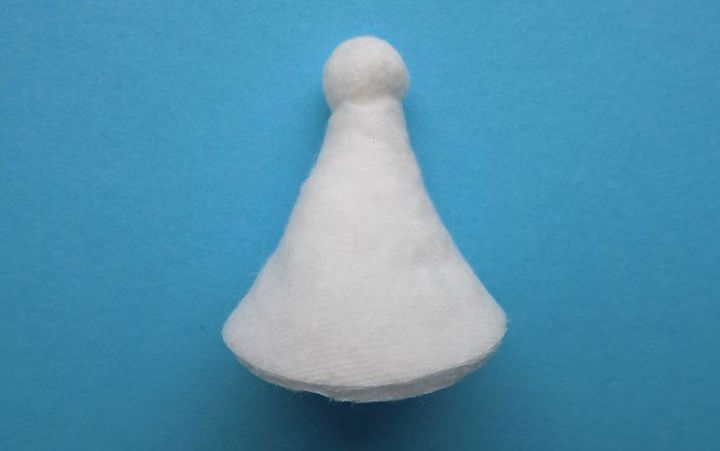
- From one half we form a ball-head. Put the ball in the center of the second half, carefully wrap.
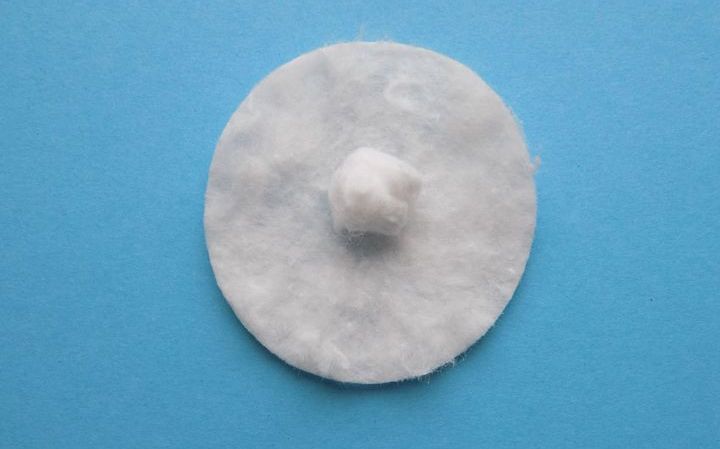
- In place of the neck, pull the white thread.

- From the second disk, cut a third, as shown in the photo. This is the blank of an angel dress.
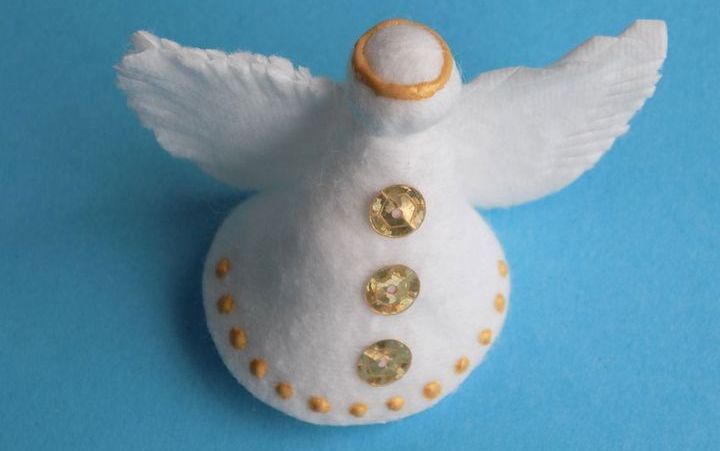
- We wrap the head with the workpiece of the dress, fasten the connection point from the inside with PVA glue.
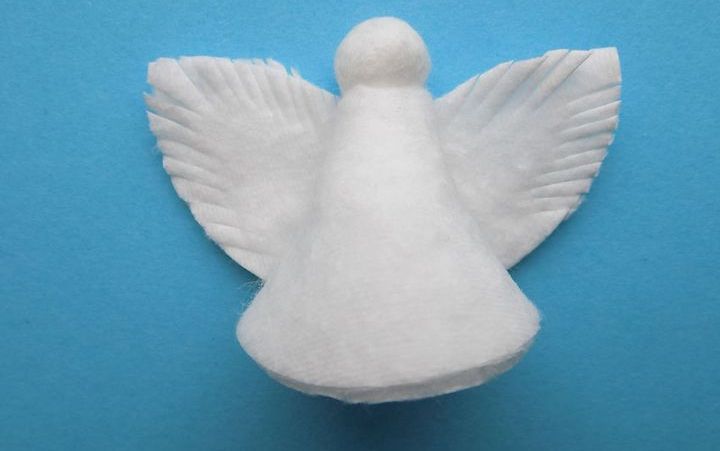
- From the third disk we make a curly blank of wings, the photo shows which they should be shaped. We cut the outer edge slightly with scissors.If you use scissors with serrated curly blades, it will turn out even more beautiful.

- Glue the wings to the back of the angel.
- Glue sequins on the front part of the dress or draw buttons with a brush and paints.
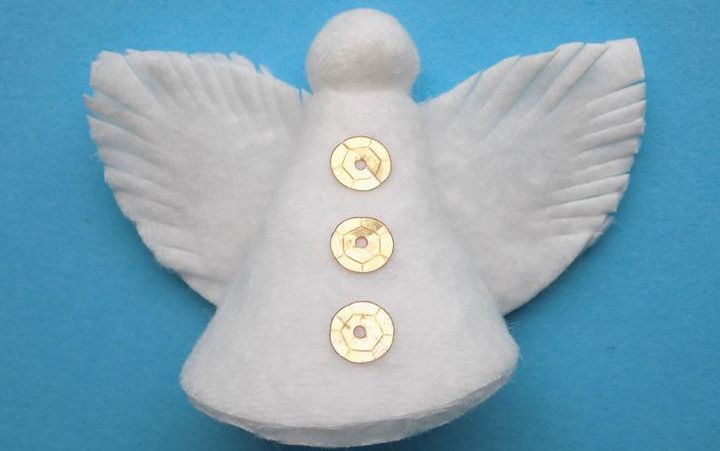
- On the lower edge of the dress we draw beads or make a through line with shiny threads. On the head we draw a halo circle.
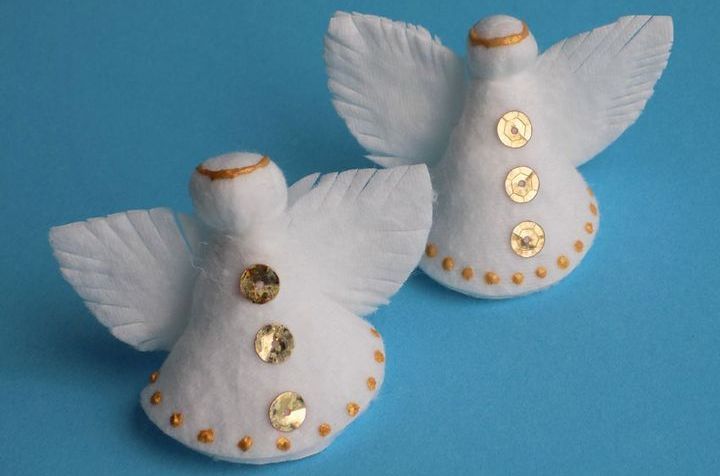
- Angels can be finished with a loop to hang on a Christmas tree or put on wooden skewers to decorate a New Year's table or interior.
Christmas trees on a cone
Large artificial or living Christmas trees decorate in almost every home, but hardly in every room. And you want the holiday sensations everywhere, so we’ll make a few small Christmas trees from everything at hand.
Let's make a cone, for this you need:
- thick cardboard of any format, the size of the tree depends on the size of the source sheet;
- a pair of compasses or a wide round flat dish that fits on cardboard;
- pencil;
- PVA glue.
We make the base cone:
- On a sheet of cardboard we place a plate of suitable diameter or draw a circle with a pair of compasses.
- Cut out the circle. Cut one quarter out of it and fold it in a bag. The bend point is with PVA glue or glue stick.
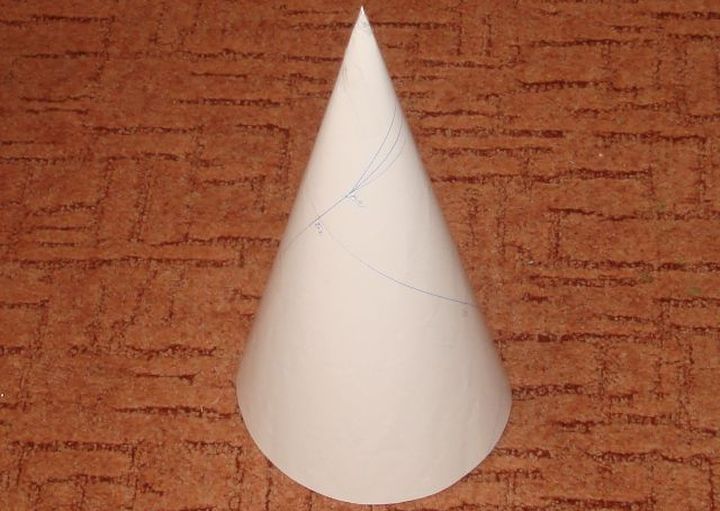
On a note! If the cardboard is very dense, it is better to use staples or Dragon glue, then the cone will definitely not fall apart.
Variants of materials from which it is possible to make “branches” on a cardboard blank:
- Fabric braid.
- Satin ribbons.
- Tinsel, complemented by real sweets.
- Cotton sponges.
- Colored paper.
- Pasta that can be pre-coated with shiny paint.
- Corrugated colored paper, decorated in different ways.
- Threads dipped in PVA glue and tightly wound around a cone. With other decor, for example, colored beads and ribbons from ribbons.
- Plastic disposable forks or spoons, only pick up the same type of elements. Can also be pre-painted or remain white.
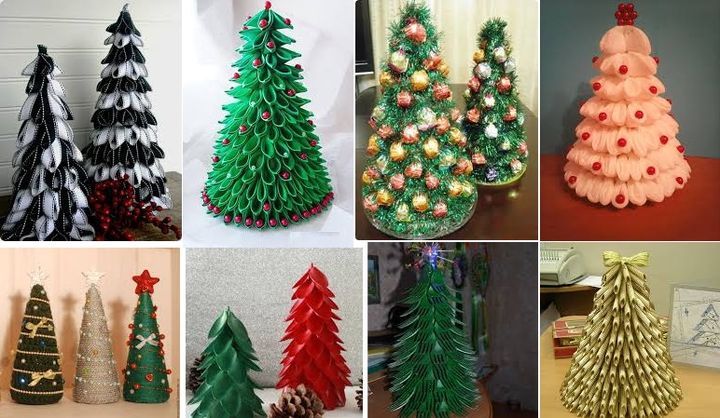
Some of these materials can be harmoniously combined, then the tree will turn out unusual and individual. Add faux snow, decorative pins, or small figures of Christmas characters.
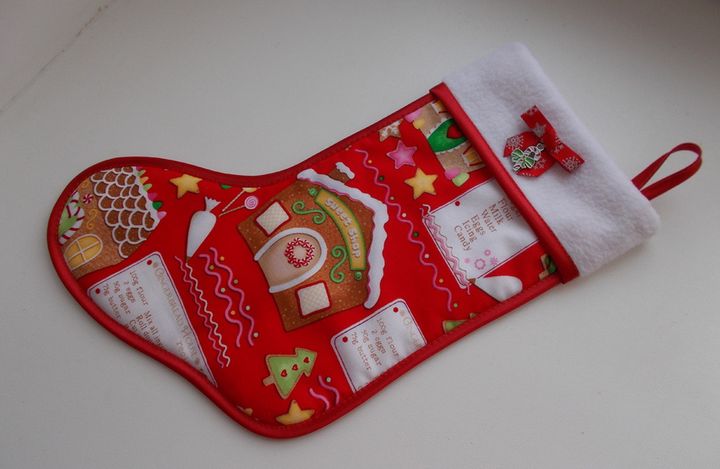
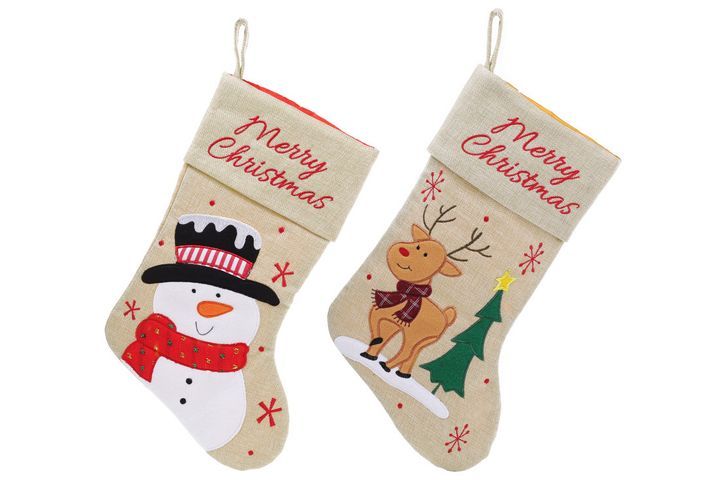
Boots for gifts
Some traditions promoted by Hollywood cinema have taken root in Russian families. A boot that is traditionally hanging by the fireplace in every American Christmas film can be made by yourself, rather than spend money on their purchase. Even five-year-olds can do sewing. The main thing is that they know how to hold the needle in their hands, well, or simply serve the necessary items during sewing: beads, tinsel, sequins and other details. This involvement of children diversifies the joint winter evenings. Plus it will create a New Year mood long before the holiday. We stock up with such materials and tools:
- a dense fabric traditionally red, but you can use any other that you like more;
- needle with thread;
- PVA glue with a narrow nose;
- blank paper and pencil;
- scissors;
- tailor pins;
- white fluffy material: batting, terry, velor;
- additional decor: fringe, sequins, asterisks, snowflakes.
We sew a boot:
- On paper, draw a blank in the shape of a boot. Cut and apply the part to the wrong side of the red fabric. Circle the blank.
- For each boot we cut two identical details from the fabric. Sew with thread around the perimeter, except for the bootleg. You can make a wrong back seam, or you can take a contrasting white thread and make a neat through decorative. It all depends on the experience and skill of the performer.
- We cover the bootleg with a soft white cloth or decorate it with fringe, beads, sequins, tinsel, snowflakes. There are a lot of decor options, choose the one that is possible or the one that children like best if you sew with them.
- If there will be boots according to the number of family members, you can sign them with a marker or glue photos of household members with glue. Then in the morning no one will confuse to whom what gift Santa Claus brought.
On a note! Be sure to sew a loop if you hang on pre-fixed hooks.
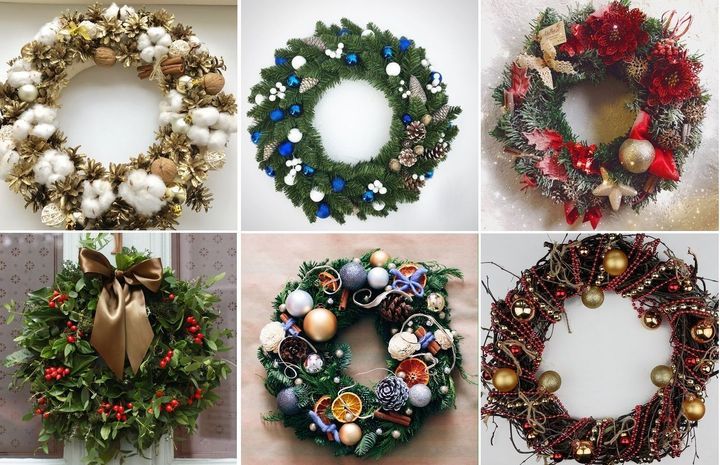
New Year and Christmas wreaths
Wreaths are made in different ways: on a cardboard frame, on a wire frame, and you can weave living from spruce branches. Sometimes they combine techniques, and after the first attempts at self-creation, personal achievements and preferences will appear. We use the simplest way:
- On a sheet of thick cardboard from the packing box, draw two circles, inscribing one into the other. Compasses are not always at hand, so we’ll use flat plates of different diameters, circle them with a pencil. With a sharp angle of scissors, we will make a hole along the circle line, cut out a ring 7-12 cm wide. If there is no cardboard, we will make the base from a thick wire twisted several times in the shape of a ring.
- Now create a volume. To do this, we will collect waste paper from the apartment: newspapers, paper, old notebook sheets. Crumple, tape the paper with tape or twine to the ring.
- Shop green tinsel, imitating spruce spruce branches, wrap the entire circumference of the ring. We lay the coils tightly so that a layer of paper is not visible.
- Natural cones, Christmas tree decorations, golden bells, satin ribbons, artificial snow, other small details and New Year's attributes are useful for decoration.
Note: if you place the wreath on a horizontal surface: a table, a pedestal, a shelf, then you can decorate it with candles. Choose candles in an iron frame or other insulating candlestick. Control the height of the candles, the higher they are, the better. Follow fire safety regulations: do not leave a lighted fire unattended!
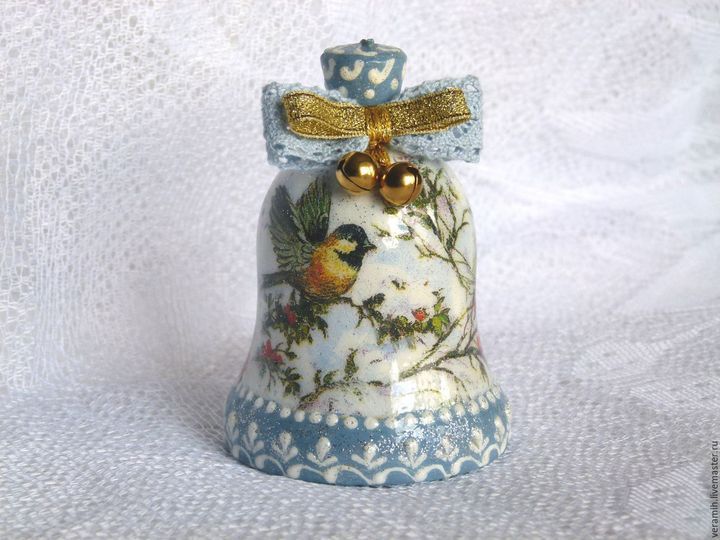
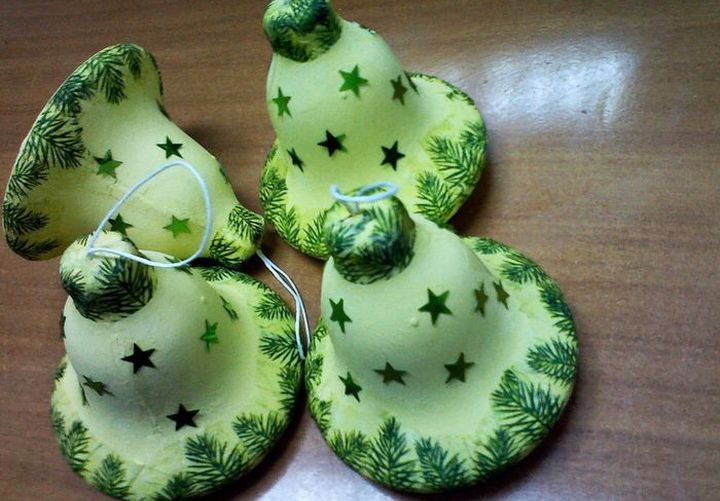
Bells
Mandatory attribute of the New Year holidays is golden, silver, multi-colored shiny bells. We choose the papier-mâché technique, for the base we take an old burnt out light bulb. We will prepare the materials:
- petroleum jelly or fat cream;
- old light bulb;
- Newspapers
- scissors;
- brushes of different thicknesses;
- paints;
- transparent varnish, even the one for nails is suitable;
- metal bell;
- tweezers;
- fine sand paper;
- awl;
- threads
- starch paste.
Instructions for implementing the idea of a bell for the New Year 2020:
- Cooking paste: pour 2 tbsp into a cup tablespoons of starch, pour cold water to half the volume. Stir thoroughly until smooth. We put a saucepan on the fire, pour 300-350 ml of water into it, bring to a boil. Pour the mixture from a cup into a thin stream. Constantly stir, cook until thickened for 5-7 minutes. Cooking a paste a few days before work is not worth it, it will turn sour. Therefore, cook on the same day. Let cool and proceed to the creative process.
- While the paste is cooling, finely tear newsprint into pieces 0.3-0.5 cm.
- Lubricate the surface of the bulb with petroleum jelly or greasy glue.
- Newspaper scraps placed for 2-3 minutes in a paste. Then we evenly shift to the surface of the bulb. It is convenient to use tweezers for this purpose.
- Put next to the radiator or blow dry. So repeat 5-6 layers.
- Leave the workpiece for a day until completely dry.
- Carefully cut off the bottom if it is uneven. Grind with fine sandpaper to make it smooth.
- We take out the light bulb. Paint the surface with paints in one color or apply patterns. After drying, varnish the product. Dry again.
- In the upper part, we make 1-2 holes with an awl. We pass the thread, we attach a metal bell from the inside. If you choose a thread longer and stronger, then you can make a loop to hang the toy on a Christmas tree or hook. You can decorate the bell with a bow from a satin ribbon or braid.
New Year's bells from plastic bottles: video
Read also:
- DIY 2020 Crochet Symbol
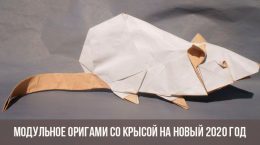
- Modular origami with a rat for the New Year 2020
- DIY Christmas Topiary for 2020

 (1 ratings, average: 2,00 out of 5)