
Content
Love needlework - we will tell you what original gifts you can make yourself by the New Year 2020 and offer step-by-step instructions with photos that will help to realize your favorite idea.
Handmade gifts are good because they do not need to be especially spent. You buy only materials, and all the necessary tools (scissors, rulers) are usually at home.
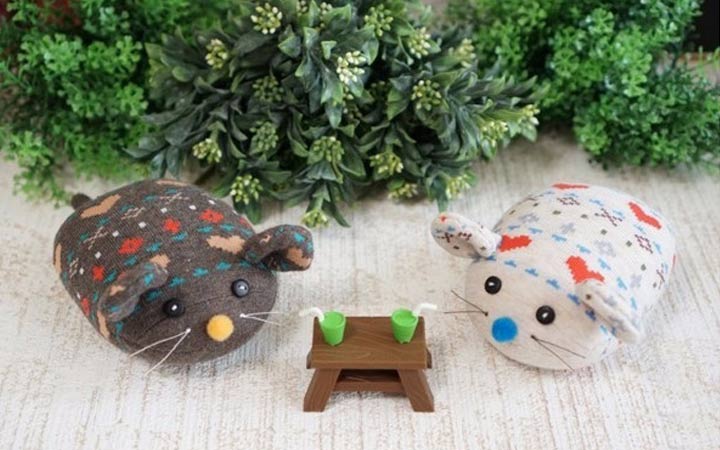
Sock rat
The owner of 2020 is the Rat (Mouse), so a homemade toy will definitely not hurt. You can keep it at home or give it to someone. And not only the child will like such an original rat. And it is done very simply.
Materials and tools for making a rat from a sock:
- sock;
- scissors;
- tweezers for the convenience of working with small parts;
- cotton threads in the color of the sock;
- needle;
- pins
- kapron threads (for antennae);
- buttons or beads (for the eyes);
- small pompom or bead (for nose)
- filler for toys (cotton wool, synthetic winterizer).
Sewing a rat is very simple. Getting down.
1. Turn the sock inside out. We cut off the heel and the toe of the sock, giving it a rounded shape so that the rat's body turns out to be oval.
2. From the remaining piece of the sock (bootleg) we cut two ears. Each ear is two pieces of fabric, because they will need to be stitched and stuffed.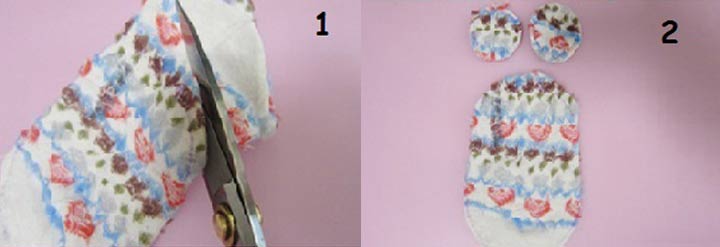
3. Turn the workpiece face out and stuff it with cotton or synthetic winterizer.
4. We sew the ears from the wrong side. You can do it on your hands or stitch on a typewriter. We turn them back and also stuff.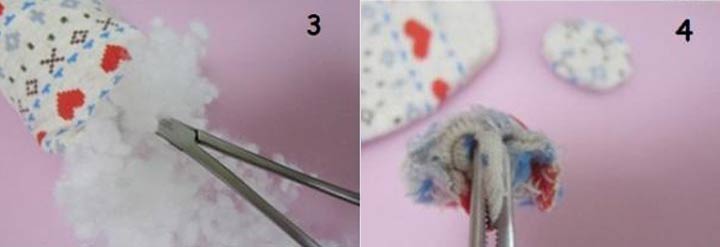
5. Cut off the gum from the sock. It will be a ponytail.
6. We pin the elastic with a pin so that it does not diverge, draw an oval smooth tail on it and cut it out.
7. Using tweezers, place the tail on the back of the rat (where the filler was stuffed).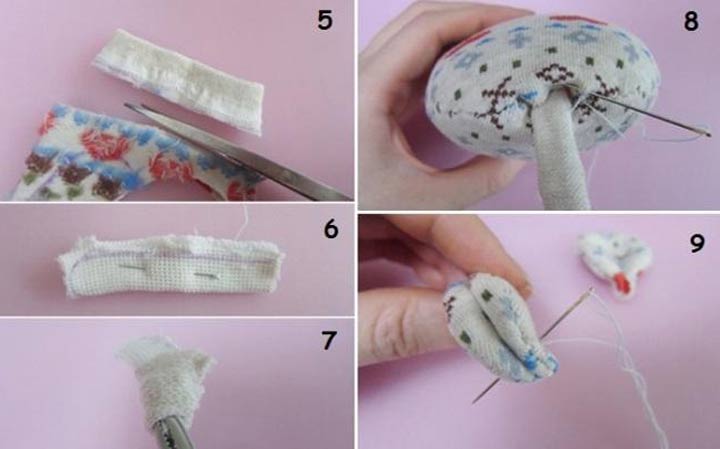
8. Sew the back side so that neither the tail nor the cotton wool fall out.
9. Making the ears. We grab them a little in the middle so that the ears are rounded and bend forward a little.
10. Sew first one eyelet to the rat. Then, without making knots and without removing the needle, we sew the second eye (we pass the needle inside the toy).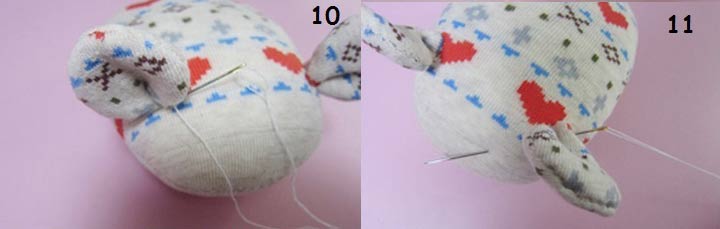
11. Again we do not take out the needle, but stick it out where the rat's eyes will be.
12. Put on the beads and sew. The nose can be sewn or glued.
13. From the kapron string we make antennae. Sew a double thread and fasten with a knot. Trim the antennae as long as you want.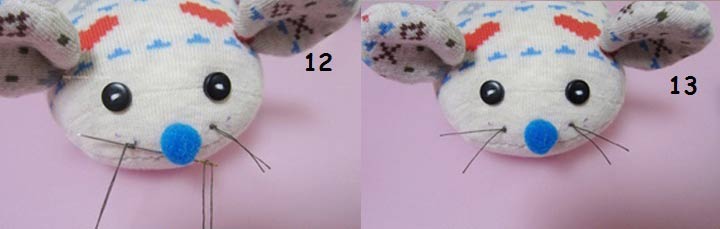
The rat is ready! She is so small and pretty that you need to make another one! You can from the second sock, or take a sock of a different color. Such a toy can also be used as a needle bed. Or give it to the cat for games.
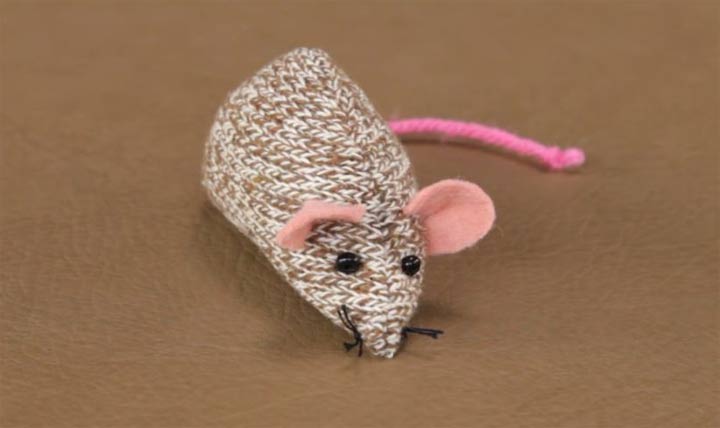
Knitted rat - 2
We continue to do homework and prepare for the New Year 2020. You might like another option for making a rat. The differences are in creating a pattern. The ears of this rat will be made of felt, and the tail will be of ordinary knitting thread.
Materials and tools:
- a piece of knitwear (in the example brown is used - the color of a rat);
- black cotton thread (for sewing eyes and making antennae);
- a small piece of pink knitting thread (for the tail);
- pink felt (for ears);
- beads (for the eyes);
- filler (stuffing);
- white threads (for stitching parts);
- felt-tip pen;
- scissors;
- needle;
- pins.
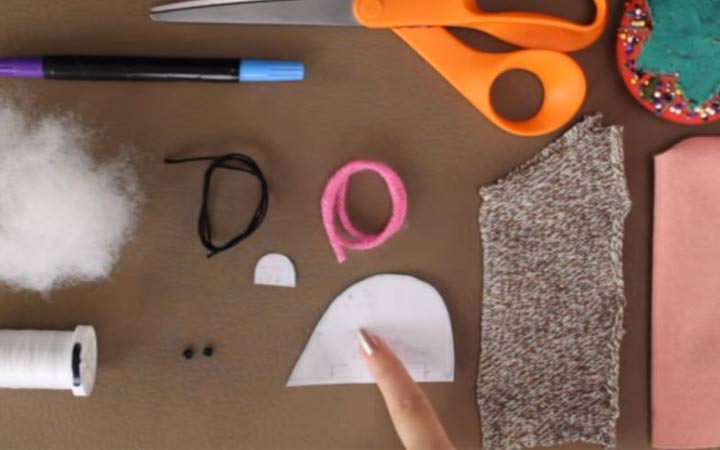
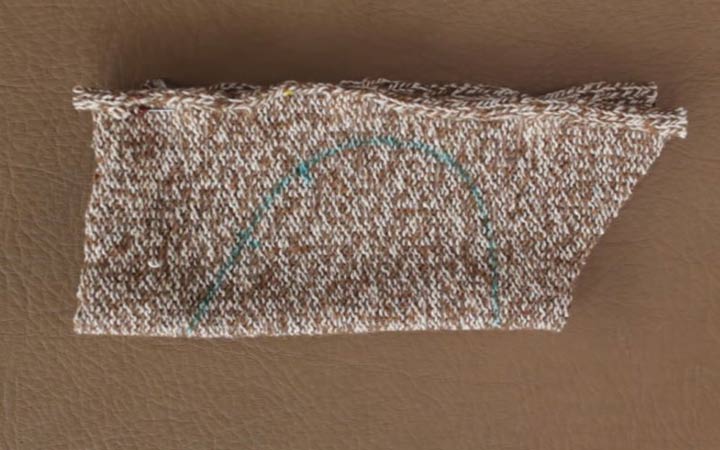
You can also draw a rat pattern on paper - the body and ears, as shown in the photo.But you can draw immediately on the fabric, because patterns are simple. Getting down.
1. Fold a piece of knitwear in half with the inside out and pin it off with pins. The size of the fabric can be any - depending on what size you need a toy.
2. Draw a tubercle on the fabric, as shown in the photo.
3. We split the workpiece halfway.
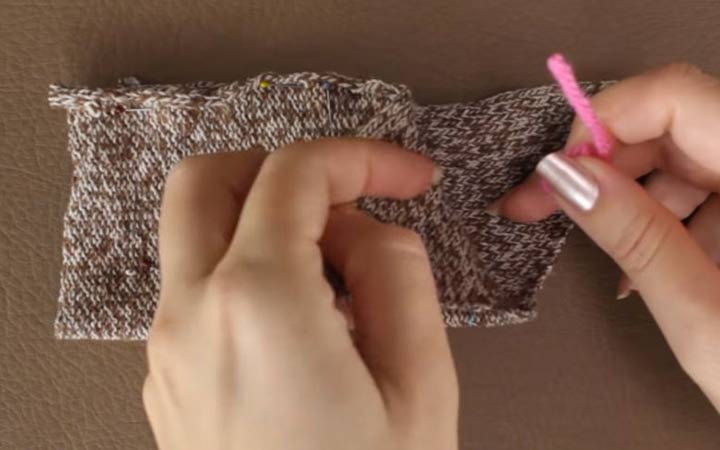
4. Insert the tail inside the fabric so that only the tip sticks out. This is necessary for proper stitching of the toy.
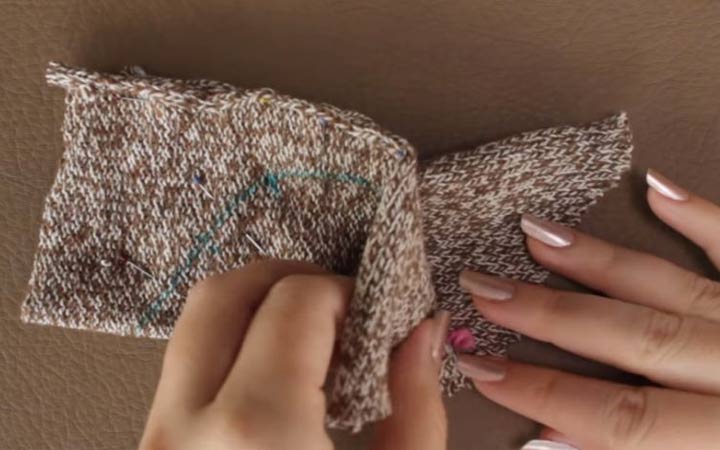
5. We chop off the workpiece completely.

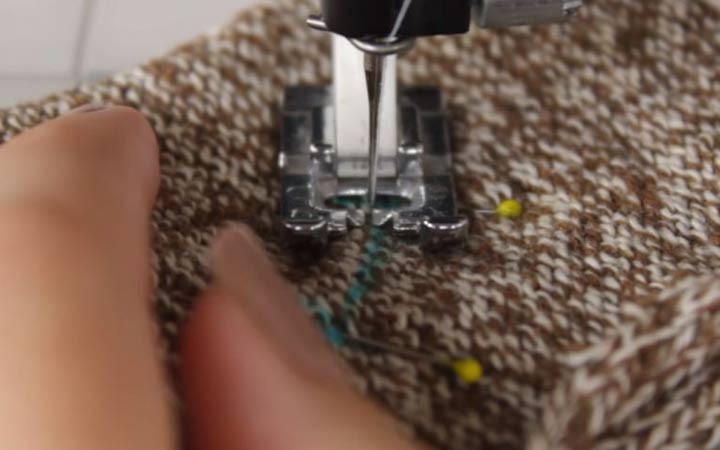
6. Stitch along the line, not forgetting to pull out the pins, so as not to damage the machine. We don’t stitch the side to which the tail is not embedded, but leave about 2-3 cm.
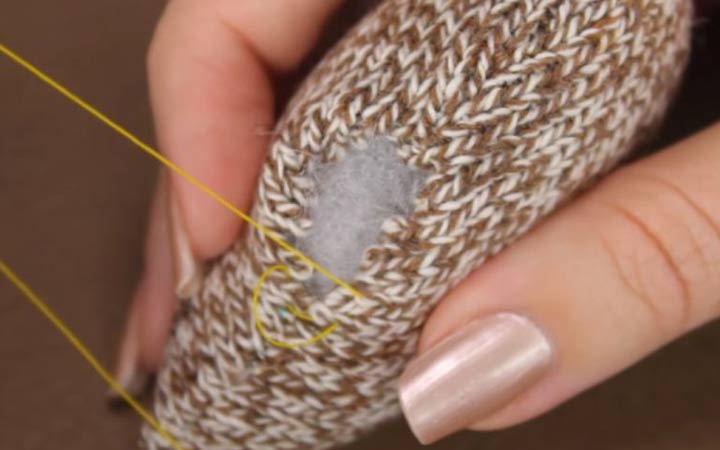
7. Turn the workpiece face out.
8. We fill the filler into the hole.
9. Sew the hole with a blind stitch. Even if you have contrasting threads, the seam will not be visible.
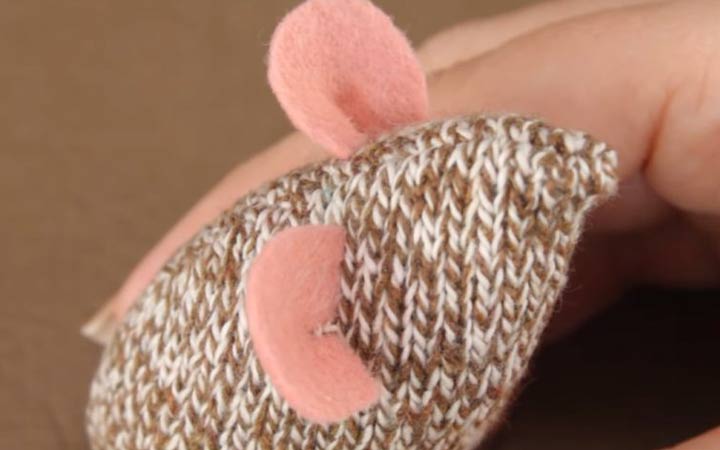
10. We work with ears. We cut them out of felt and grab a little thread in the middle, so that the eye is rounded and bent a little forward.
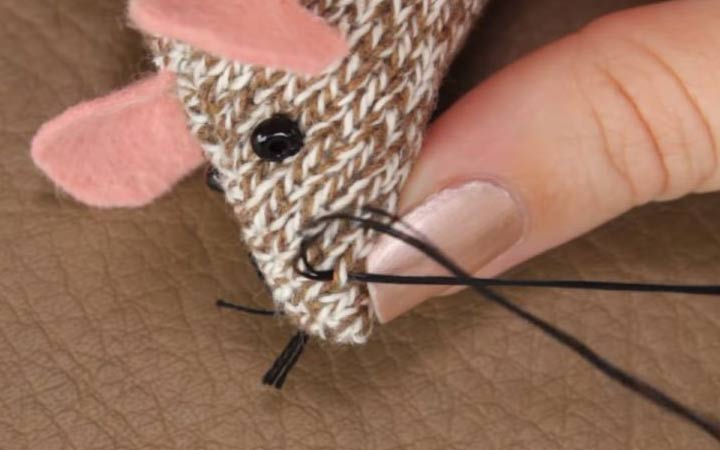
11. Sew the ears to the head of the rat.
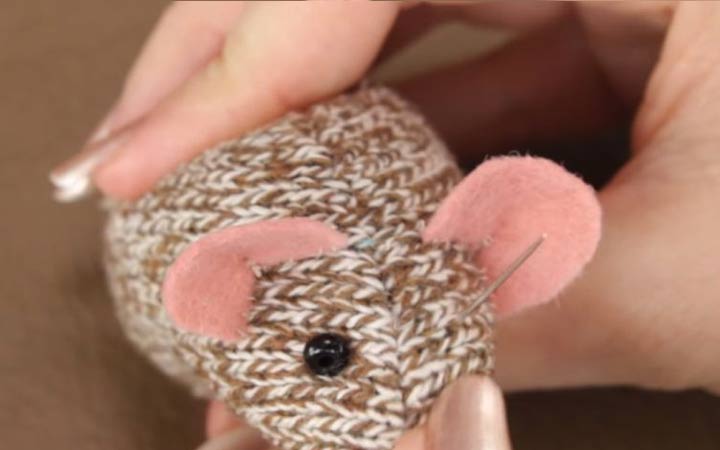
12. Sew eye-beads with black thread.
13. It remains to make a mustache. Without cutting the thread after sewing on the eyes, we bring it to the nose of the rat and make a tendril.
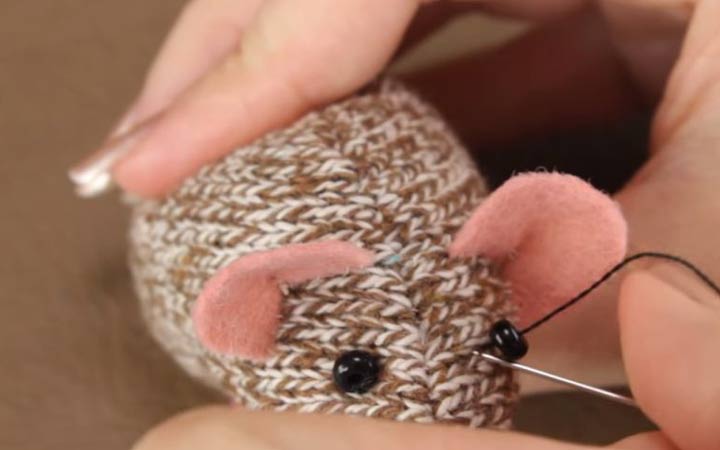
14. Cut the thread to the desired length of the mustache.
The rat is ready! You can also make her a nose made of beads, a small pompom or knitting threads. Such a toy can also serve as a needle bed or just be an adornment of a coffee table or shelf before the New Year.
Bead mouse
Recall the good old beadwork, which was popular in early 2000. If you don’t have any beads from your childhood, you can buy them in needlework stores. We suggest weaving such a simple mouse that even one who has never worked with beads before can handle it.
Materials and tools:
- white beads;
- black beads;
- 2 contrasting beads (for example, red) for the eyes;
- 1 pink bead (for nose);
- fishing line (about 50 cm. It is no longer necessary, because it will be inconvenient to work with long ends);
The scheme is as follows.
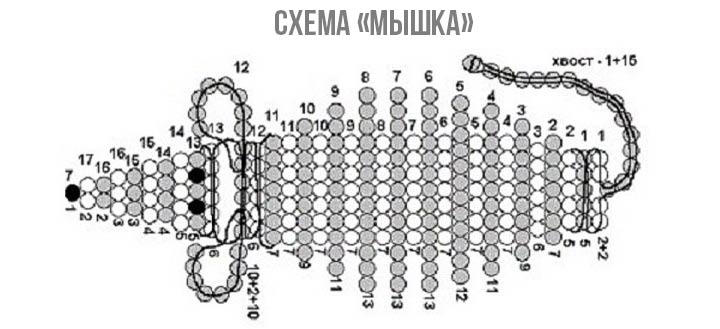
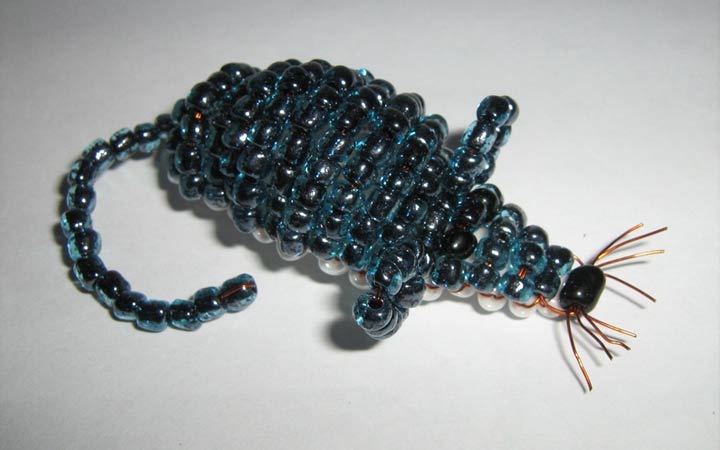
Despite such a simple scheme, the mouse will turn out to be voluminous. Black beads - this will be the back, and white - the tummy. Getting down.
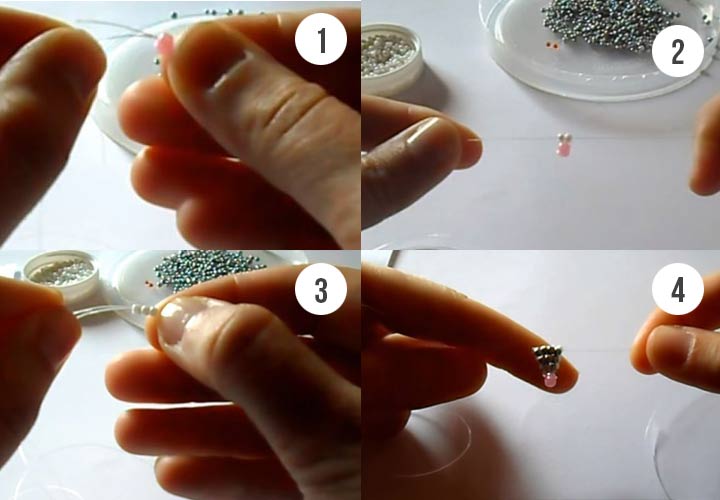
1. Weaving begins with the nose of the mouse. We string pink beads on a fishing line. We pass the other end of the fishing line inward so that the bead is tightly fixed by the fishing line.
2. Next, put two white beads on the fishing line and fix them. This is the beginning of the tummy.
3. We collect two black ones and fix. They will automatically be placed on the other side of the whites. And that will be the beginning of the back.
4. We continue to act according to the scheme. Each time, inserting the free end into a row of beads will be more difficult, because their number will increase. Tighten the line as tight as possible so that the finished product is neat and beautiful. Do not be afraid, the fishing line will not break.
5. A little complexity will arise at the stage of weaving ears. We collect 2 black and 7 white beads on one side of the fishing line. Then, with the same edge of the fishing line, we go into the first white bead (it turns out, into the third common).
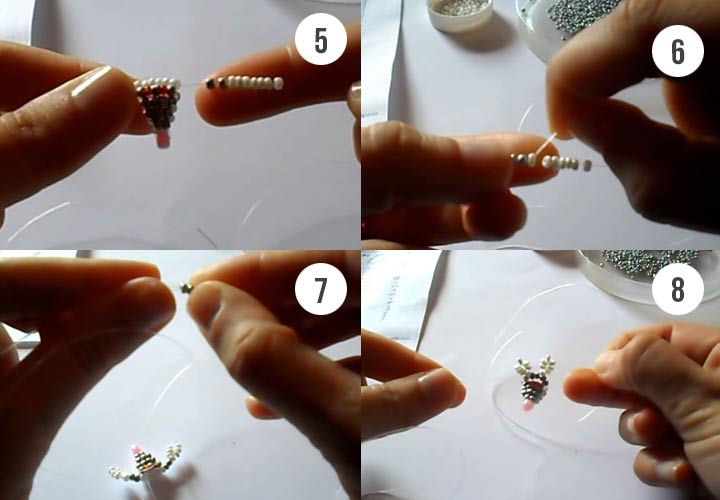
6. Similarly, we do with the other end of the fishing line.
7. To fix this row, we collect two black beads and fix in the usual way.
8. To return to the previous row (now our fishing line is sticking out of the ears, and if we continue weaving, the mouse will get a hole in the middle), we pass each end of the fishing line into the nearest gray beads (two at once).
9. We continue to weave according to the pattern. Next in line are 7 white beads, etc.
10. At the very end, make a ponytail. We collect 10 (as many as possible) beads at once on both ends of the fishing line.
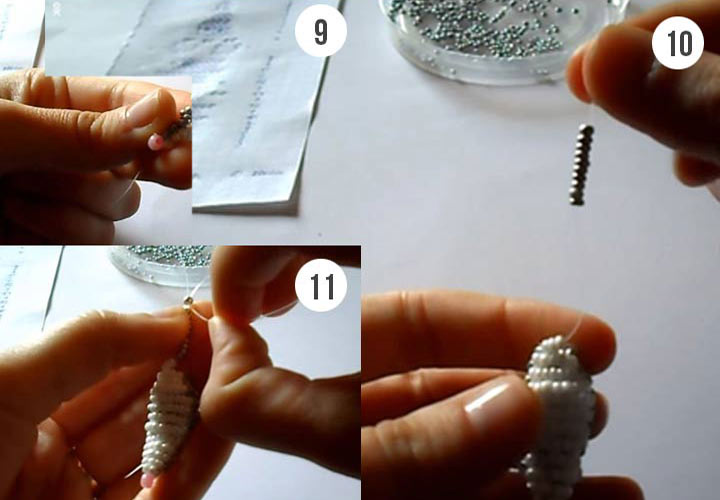
11. In the last bead, we once again thread one end of the fishing line to secure the entire mouse.
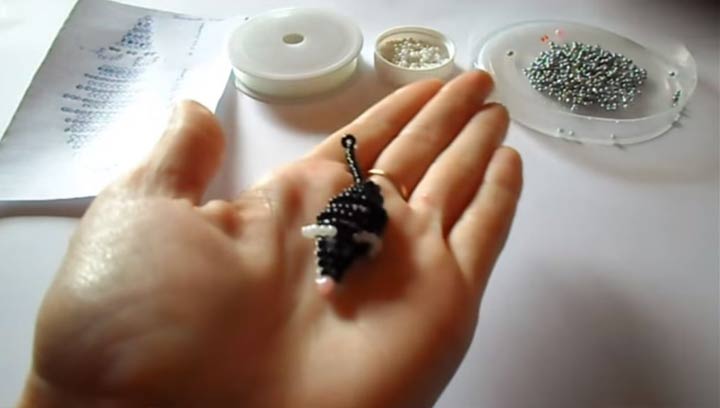
12. Tie tight knots and cut the fishing line.
The mouse is ready! If you multiply the amount of beads, you get a big product. A small mouse can be presented or even hung on a Christmas tree.
Knitted christmas tree
What is needlework without knitting? If you know the basics of crocheting, then you can easily make an eternal symbol of any New Year - the Christmas tree.
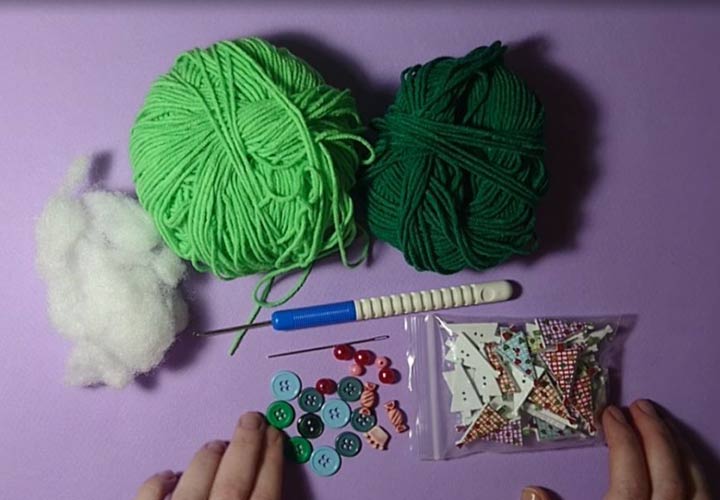
Materials and tools:
- green woolen or acrylic threads (you can choose any shade);
- Crochet hook;
- Christmas tree filler (cotton, synthetic winterizer);
- decor: small buttons, stickers, beads;
- a needle with a thread for sewing decorative elements or hot glue for gluing them.
Getting down.
A Christmas tree is a cone. And we will start knitting with the angle of the cone, i.e. from the top of the tree. We collect 5 loops and knit 5 SC.
Second row: 1 single crochet runs through each stitch. There will be 5 loops in total.
Third row (add loops): 2 single crochets in each loop There will be 10 loops in total.
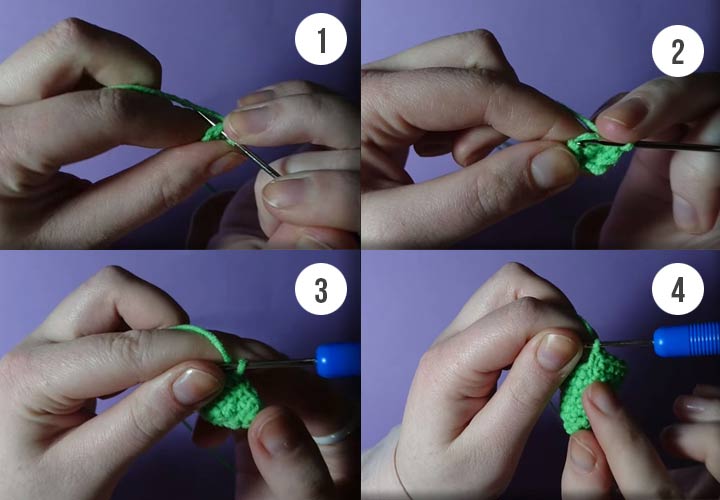
Fourth row: no change.
Fifth row: no change.
Sixth row: 1 single crochet in the loop, and in the next loop we make an increase - 1 regular column. There will be 15 loops in total.
Seventh row: no change.
Eighth row: no change.
Ninth row: 2 single crochet in 1 stitch plus 2 regular stitches. Already got 20 loops.
Tenth row: no change.
Eleventh row: no change.
Twelfth: 2 single crochet in 1 stitch plus 3 regular stitches. Now we have 25 loops.
The principle seems to be clear: we knit two rows without changes, and every third we make an increase and increase the number of columns.
We continue to knit like this until we get to the 23rd row, which will already have 40 loops.
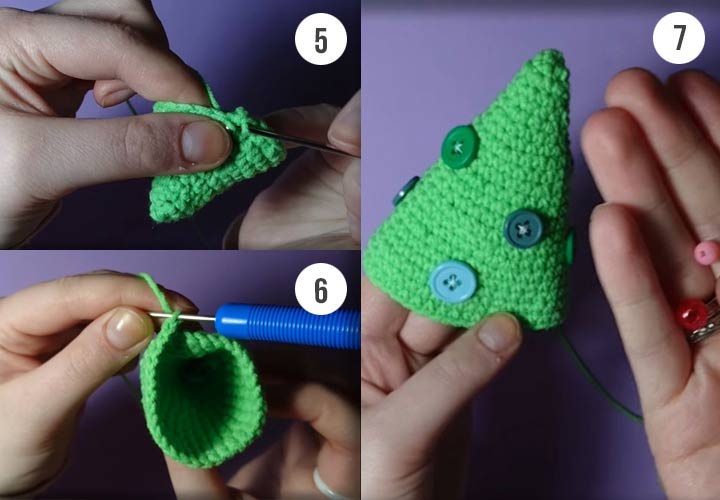
The base of the Christmas tree is ready. We do not take out a thread yet! It will be needed to knit the bottom of the tree.
We decorate it with buttons and other decorative elements.
Now we knit the bottom of the Christmas tree. For knitting we will use the back loops (shown in the photo).

First you need to make a decrease, then knit 6 SC, again a decrease, again 6 columns. And so on until the end of the row. There will be 35 loops in total.
Next row: decrease + 5 columns. Then decrease + 4 columns, etc.
As you knit, fill the Christmas tree with stuffing. It should not be filled a lot, otherwise the product will turn out to be too dense.
The last loops will be only decreases. They will close the bottom of the tree entirely. The thread can now be cut.
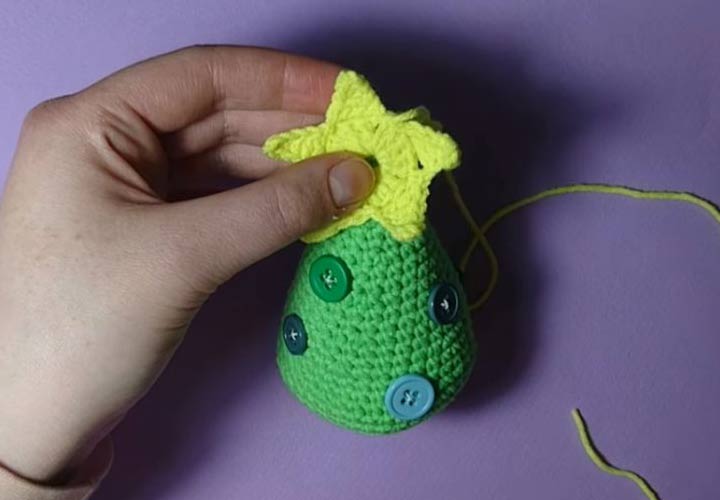
The Christmas tree is almost ready! It is stuffed with filler and decorated. But not enough stars. We will also crochet it. In our example, the star is yellow, but you can make red.
1. We knit a standard ring: we collect 3 air loops.
2. We make a crochet on the hook and begin to knit a column with 1 crochet. There will be 14 of them.
3. Then tighten the ring and make one connecting column to make a circle.
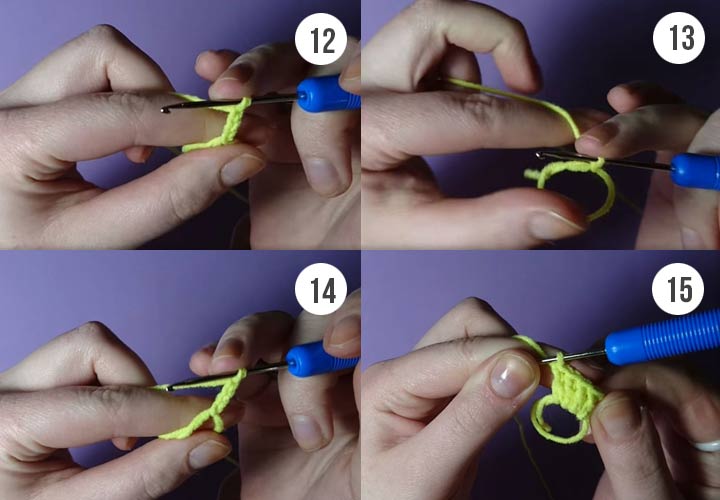
4. We knit rays: we collect 6 air loops.
5. We go into the third loop from the hook and make 1 single crochet.
6. Then a half-column, then a double crochet, then a double crochet. We knit all the crochets.
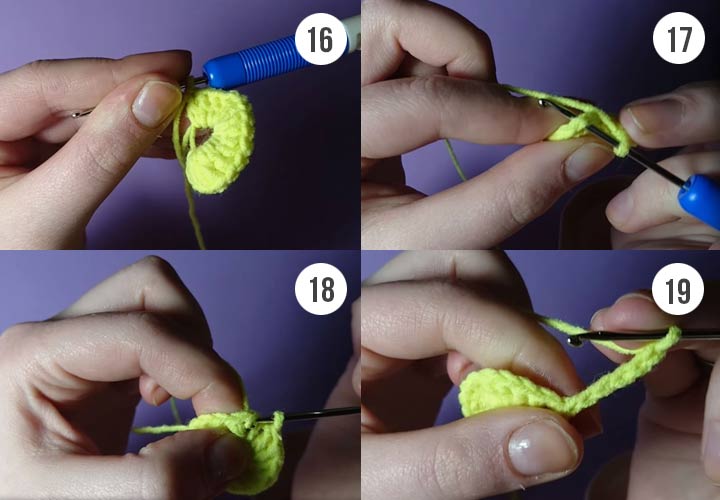
7. In the third loop on the circle we knit a connecting column.
8. Similarly, we do the remaining 5 rays, starting each time with 6 air loops.
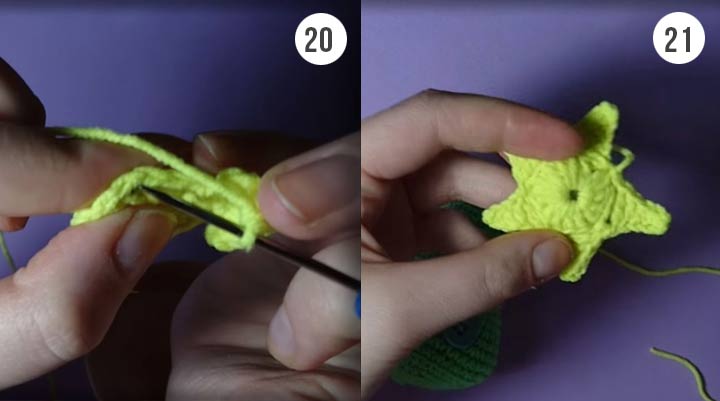
9. The star is ready! Sew it to the Christmas tree.
Knitting a Christmas tree is an ideal pastime on New Year's Eve for those who love needlework. You can include a movie about the New Year or Christmas tunes, make cocoa and sit down for knitting.
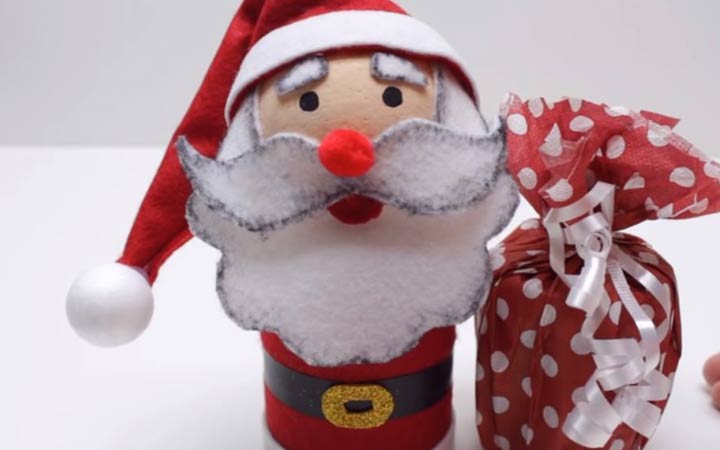
Santa Claus from plastic bottles
There is a symbol of the New Year 2020 - even as many as 2 rats and 1 mouse. Herringbone is ready too. It remains to make the main New Year's wizard. Someone will say that making something out of plastic bottles is not needlework. But after all, we will do everything with our own hands, so very needlework.
Materials and tools:
- 2 cylindrical plastic bottles;
- red foamiran;
- red felt;
- white felt;
- black electrical tape;
- black marker;
- golden foamiran or beautiful brooch;
- foundation or beige paint;
- brush;
- scissors;
- hot glue;
- two foam balls: one slightly larger than the diameter of the bottle, the second with a diameter of 1-2 cm;
- toothpick;
- New year paper napkin or red.
You can make funny Santa Claus with your child. He will also like this simple and fun needlework.
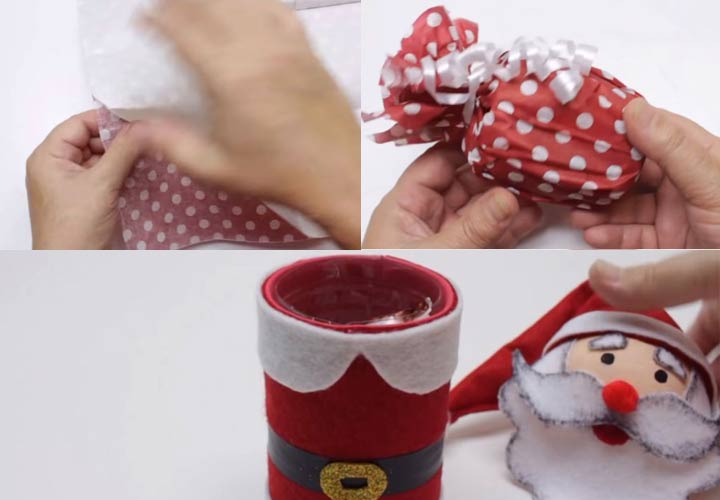
1. Cut the plastic bottle to get a cylinder with a bottom.
2. Measure it and cut a rectangle from felt. Also cut out a similar rectangle from foamiran.
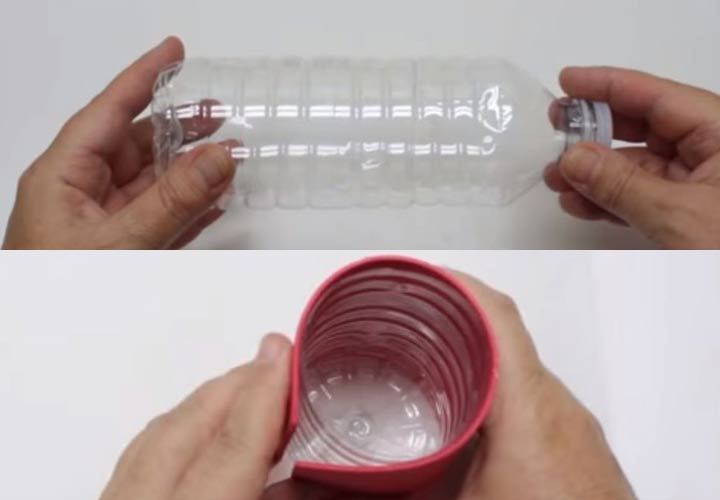
3. Glue foamiran to felt. This is a fur coat.
4. Glue the coat to the bottle.
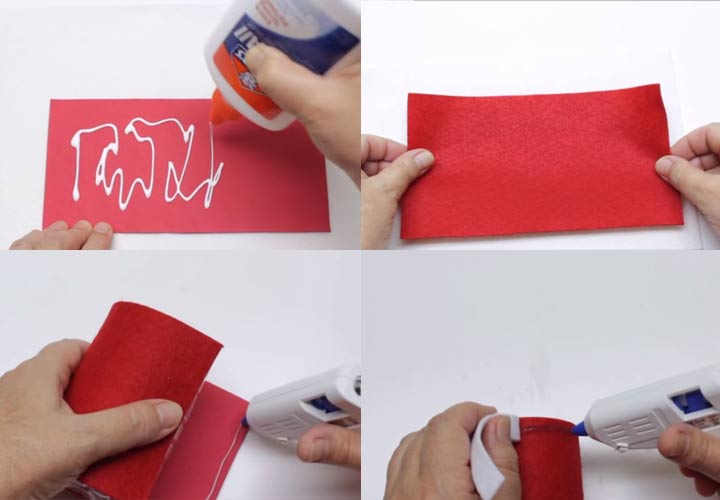
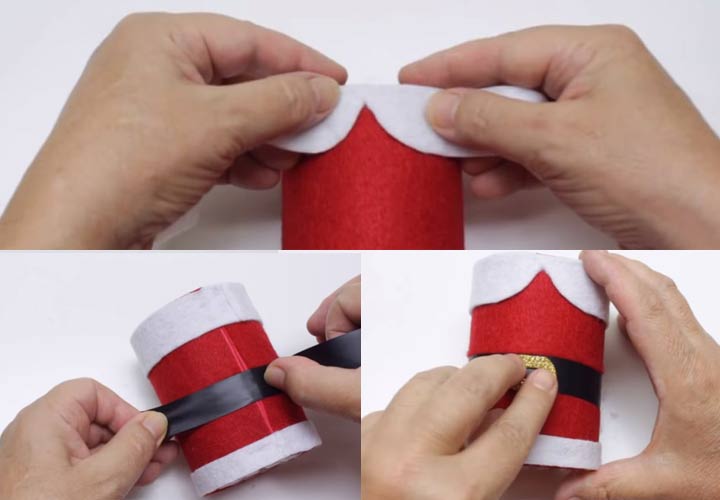
5. We randomly cut out details from white felt: the hem and collar of a fur coat. Glue them on the base.
6. From the black tape we make a belt.
7. We attach a buckle of golden foamiran to the belt. Or it could be a real brooch.
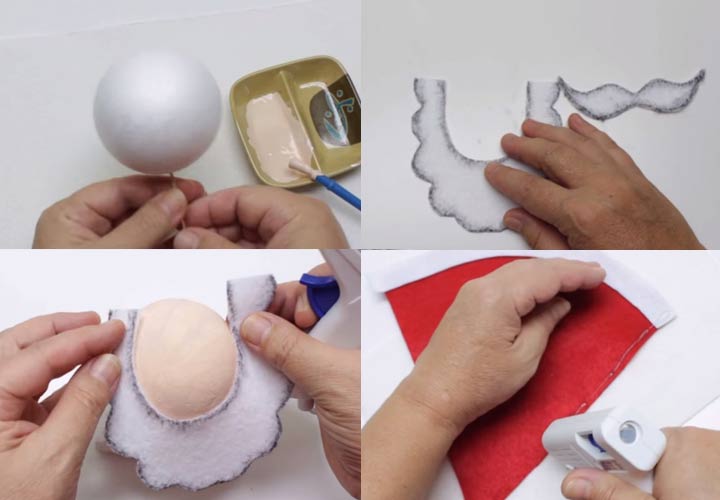
8. Now we make the head.We put on a toothpick a large foam ball and cover it with foundation or beige paint.
9. While the ball is drying, cut out the blanks: beard, mustache and eyebrows. For special beauty, the edges are tinted with a black marker, giving a beautiful contour.
10. We also cut out small details: nose, mouth.
11. On a dried ball we stick a beard, then a mouth, then a mustache, then a nose.
12. Eyes are drawn with a black marker. Paste in the eyebrows.
13. We make a hat from a triangular piece of red felt. Glue a white strip on the edge.
14. “Put on” a hat on the head and glue it.
15. We bend the tip of the cap and also glue it so that it does not protrude.
16. We stick a small foam ball on the tip of the cap.
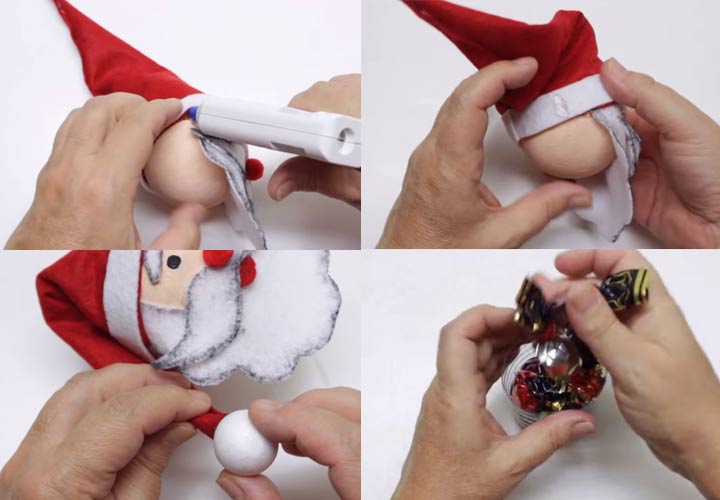
17. Make a gift: cut off the second plastic bottle and fill it with sweets.
18. From the napkin, disconnect the upper beautiful layer and pack the cylinder into it. Tied with a ribbon - a gift.
19. The body of Santa Claus is also filled with sweets and covered from above with our heads.
It turns out a wonderful New Year toy toy that children will definitely appreciate. This is real needlework, which we created with our own hands. You can connect imagination and make a Snow Maiden in a similar way. It will take all the same, but the felt will need to be taken in blue.
Read also:
- Cabinet decoration for the New Year 2020
- Window cutters for the New Year 2020
- DIY Kanzashi for the New Year 2020
 (No ratings yet)