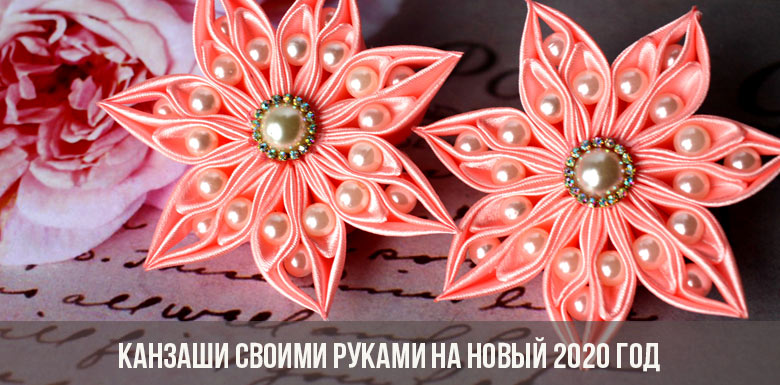
Ahead is the New Year 2020, which means it's time to think about how to make friends and relatives interesting crafts, souvenirs or hair clips using the kanzashi technique with your own hands.
Bright and unusual kanzashi jewelry is a great idea if you want to please mom, girlfriend or sister! They will be delighted with the original presentations made by you personally.
What is kanzashi?
This word came from Japanese. It means jewelry in the form of flowers and all kinds of bizarre elements that geisha wear on their heads. Kanzashi is made from various materials, but the flowers are made from silk - this is the most suitable fabric that allows you to simulate flower petals.

We use cheaper and more convenient materials for kanzashi - satin ribbons of different widths. It is from them that we will create crafts for the New Year 2020. There are many workshops on the subject on the web. Especially popular videos from a girl named Lerita. She is seriously passionate about Kansashi, and her work is amazingly beautiful. We will consider the most original, but at the same time simple crafts that anyone can do with their own hands at home.
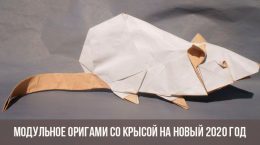
Kanzashi rat
The symbol of 2020 is the Rat. Therefore, we will make a charming rat out of petals.
We will need the following:
- polystyrene base - a ball with a diameter of about 5 cm (sold in stores for creativity);
- blue satin ribbon (2 cm wide, at least 2 m long);
- white satin ribbon (2 cm wide, at least 0.5 m long);
- white satin ribbon (5 cm wide, at least 0.3 m long);
- lighter or candle;
- hot glue;
- scissors;
- felt-tip pen;
- black beads for eyes and nose.
The work is painstaking and long, but simple. Kanzashi crafts will appeal to those who like to spend time embroidering, knitting and other types of needlework. This is a creative process that captivates so that time flies by.
1. From a blue ribbon (you can take a gray or brown one - what kind of rat do you represent) we cut 2 * 2 cm squares. It will take at least 50 squares.
2. We take a square and bend it in half diagonally. We get a triangle.
3. Bend the triangle in half, and then again in half. We get a petal.
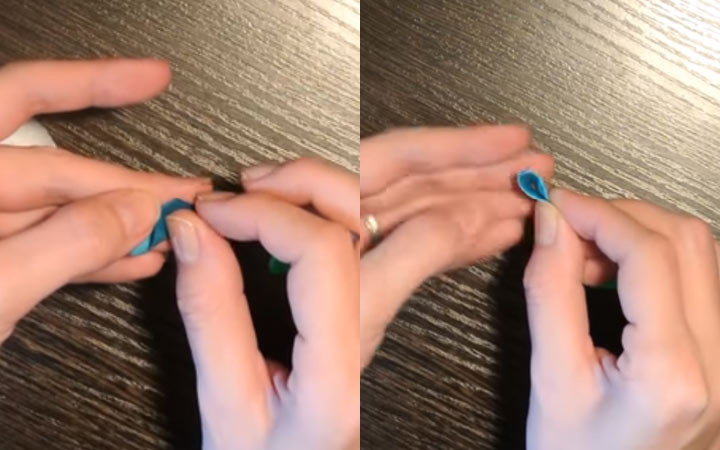
4. To fix the petal, we pass along the diverging edge of the lighter: the flame glues the atlas. We do similarly another 50 petals.
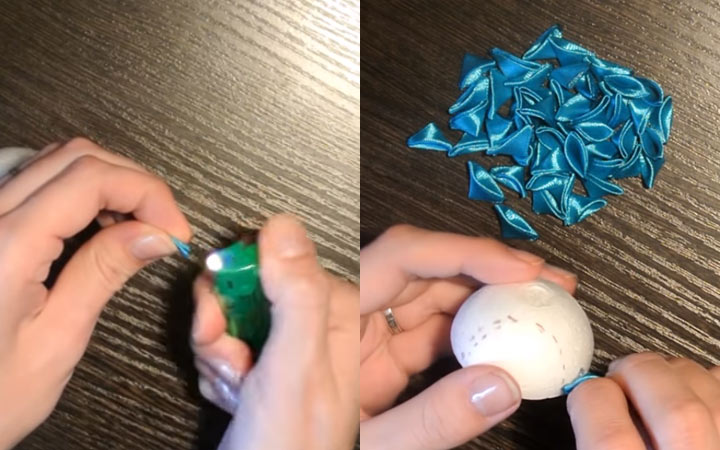
5. Foam ball cut in half. This is the body of the rat and the base of its muzzle.
6. Separate the base of the muzzle, drawing it with a felt-tip pen.
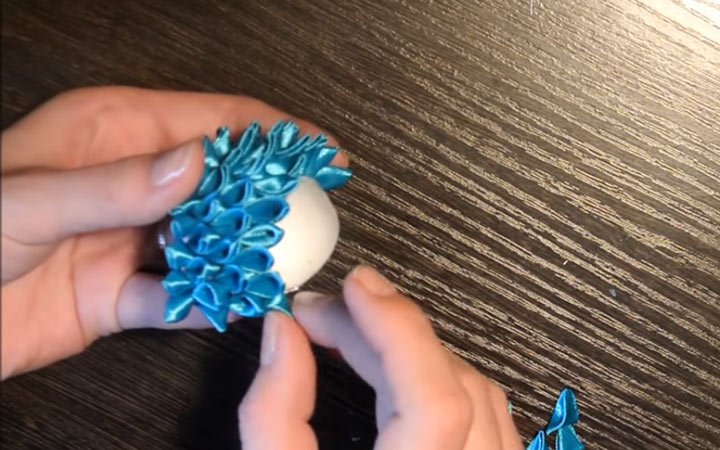
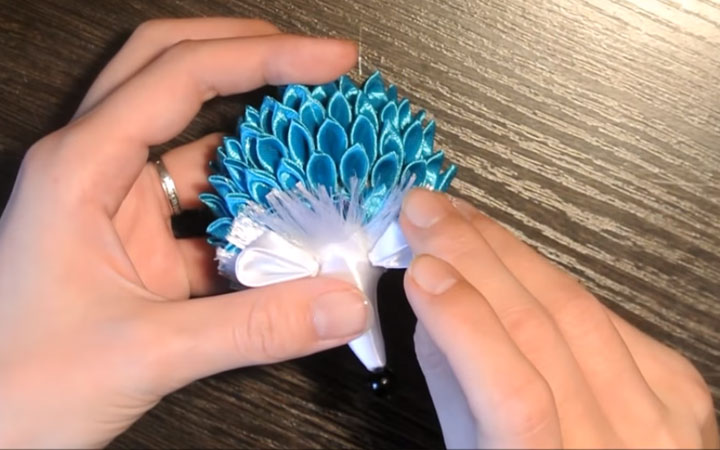
7. We begin to fill the body of the rat with petals, gluing them to the hot glue row by row.
8. Make a muzzle from a wide white ribbon: take a square 5 * 5 cm, fold it in half diagonally and fix it on the edge with a lighter.
9. From a narrow white ribbon we cut squares 2 * 2 cm. We need 6 pieces: 4 paws and 2 ears.
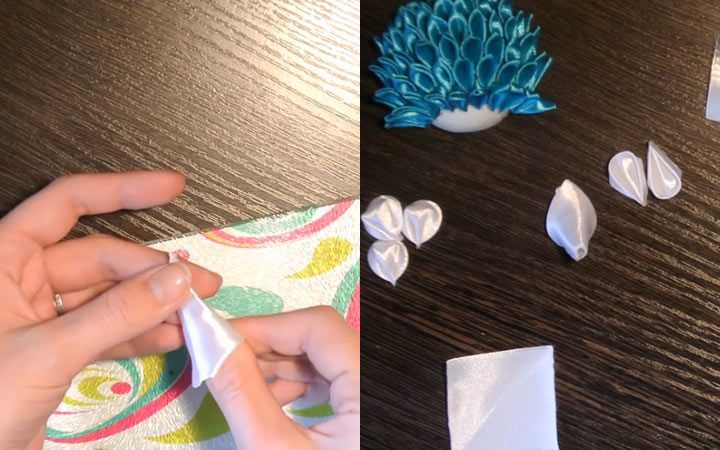
10. Make petals from white squares.
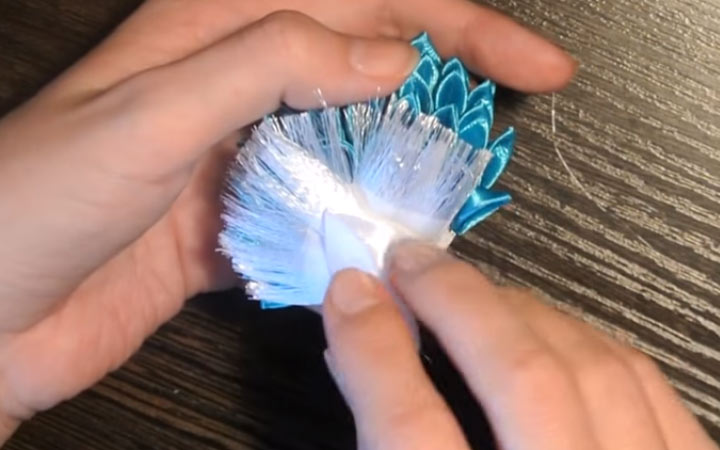
11. It will take 3 more strips of a white ribbon about 5 cm long. From each strip we take out long threads to get a fringe - it will be rat hair.
12. Glue 3 layers of wool to the face.
 13. Glue the nose.
14. Glue the muzzle with wool and nose on the body.
15. It remains to add eyes, ears and paws: also glue on hot glue.
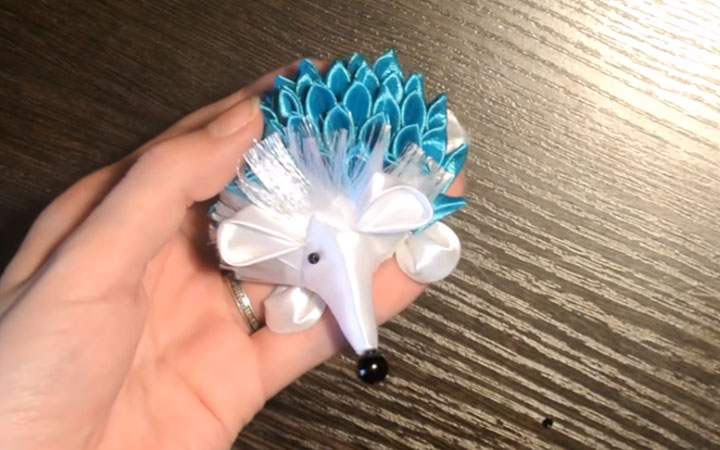
Symbol of 2020 - Kanzashi rat is ready! You can attach a rope to it and hang it on a Christmas tree. Or give it to someone.
Kanzashi Christmas tree
What New Year without a Christmas tree? In the kanzashi technique, you can make a Christmas tree of amazing beauty and splendor with your own hands. The main thing is to choose a tape of saturated green color.

To work, you will need the following:
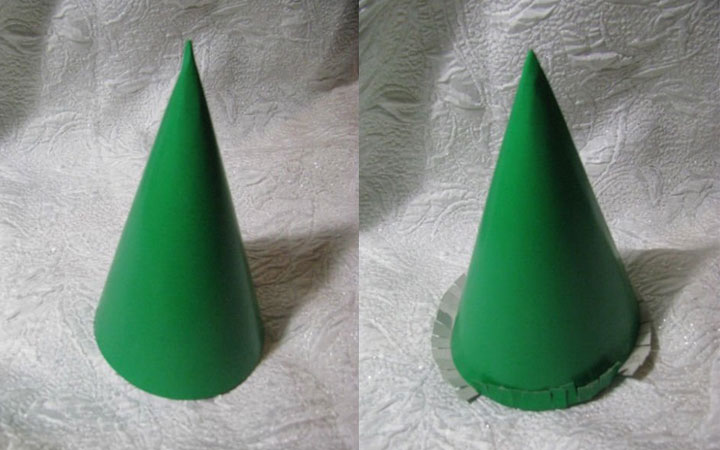
- green cardboard cone (in our example, the height of the cone is small - about 10 cm, but you can make it any size);
- green satin ribbon 3 cm wide;
- lighter or candle;
- scissors;
- tweezers;
- hot glue;
- decorations for the future Christmas tree (beads, beads, decorative stars, etc.).
Getting down.
1. To make the Christmas tree more stable, we’ll make it a bottom. Cut a circle out of cardboard and glue it to the bottom.
2. Now we will make the petals. Let's make them in two ways.
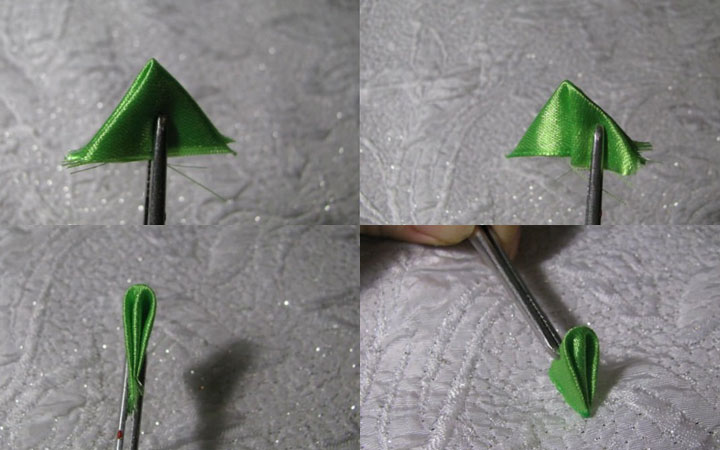
3. The first method, as in the previous example: first, make a triangle from a 2 * 2 cm square, then fold it in half again and again in half. We process the edges with the flame of a candle or lighter to glue them.
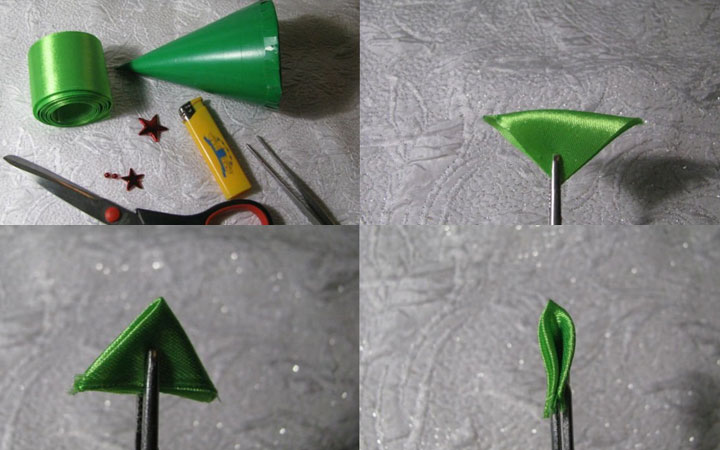
4. The second kind of petals is done a little differently. We first fold the square diagonally, then again in half. And now we turn both edges out and we also go through the lighter. The photo shows how this is done in stages.
5. Having made several different petals (at least 50 pieces will be needed, but it will be possible to finish them in the process), we begin to collect the Christmas tree from the bottom up.
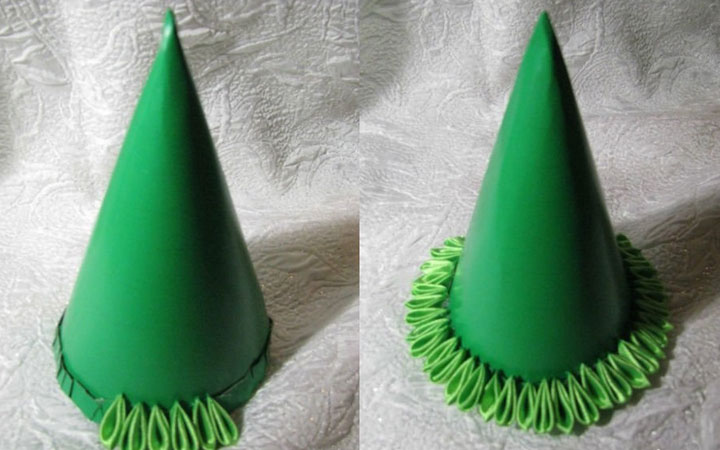
6. Glue kanzashi petals alternately: first of one kind, then another. So the Christmas tree will be more magnificent.
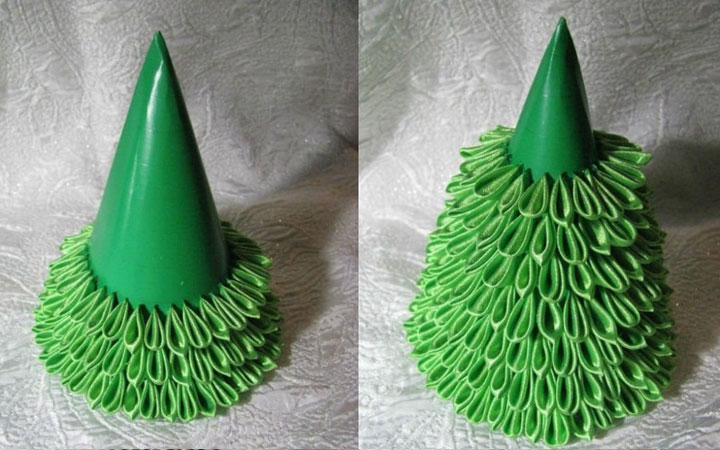
7. Continue sticking the petals until the cone is full.
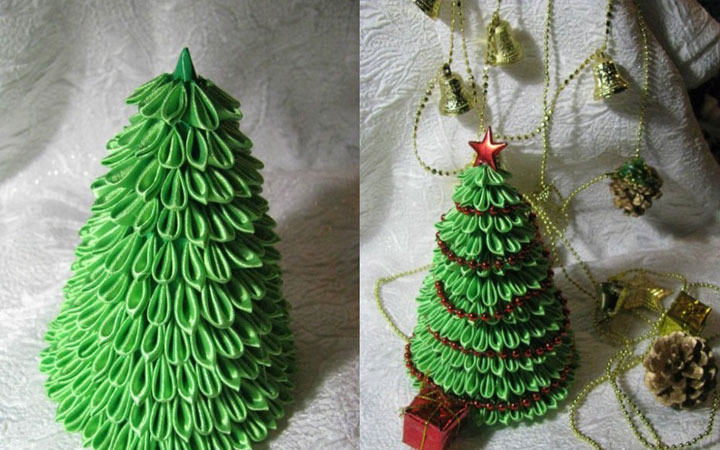
The Christmas tree is ready! It remains to decorate it with beads and an asterisk. If you want, the bottom can not be glued. And then under the Christmas tree-kansashi it will be possible to hide small gifts. For example, a ring or candy.
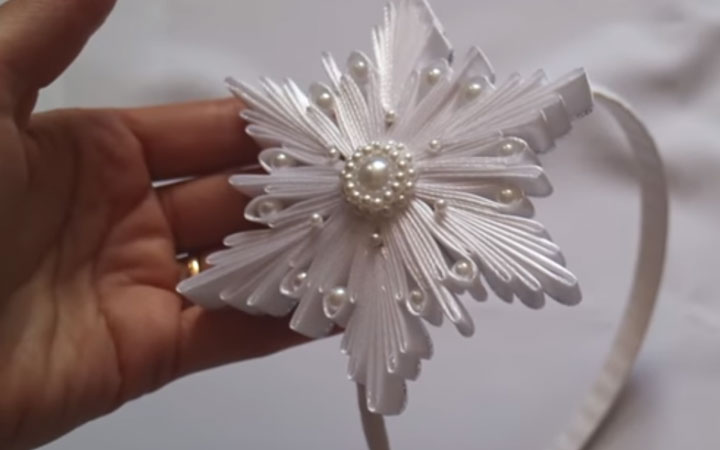
Kanzashi snowflake
Still, the most beautiful crafts in the kanzashi technique are flowers and snowflakes. Due to the symmetry, the products are very attractive. And the scope for creativity is huge: you can use different colors and color combinations, as well as decor: beads, beads, etc.
Once ahead of the New Year, make a beautiful snowflake. We used white ribbons, but you can take silver, blue and any others. What do we need for work:
- a roll of white satin ribbon 2 cm wide;
- beads (large and small);
- hot glue;
- scissors;
- ruler;
- cotton pad;
- a pen;
- stationery clips (a couple of pieces);
- lighter or candle.
This is even more painstaking work than a herringbone or rat using the kanzashi technique. But the result is worth it.
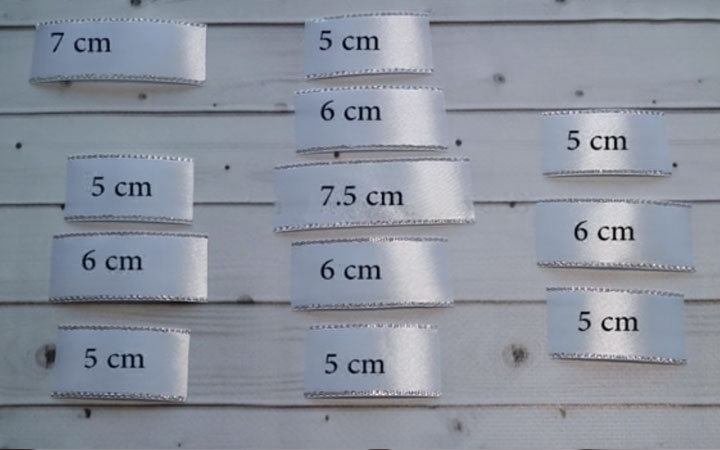
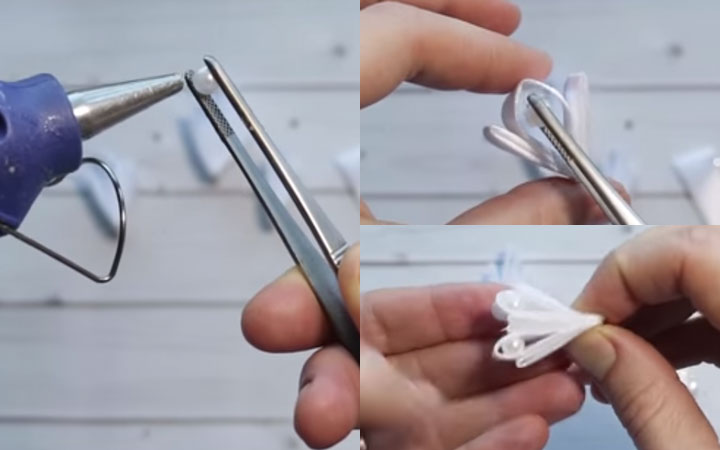
1. Cut pieces from the tape of the same length as shown in the photo. This is a starting set of blanks that will make only one petal of a future snowflake.
2. Take a piece of 5 cm and fold it in half lengthwise.
3. Then fold in half across and fix with a clamp.
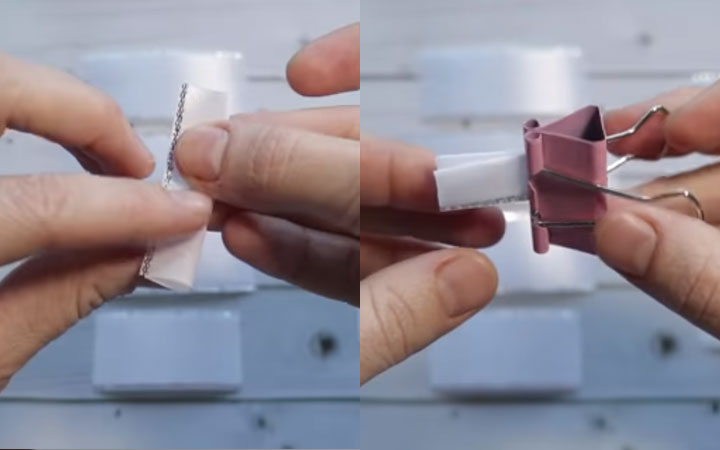
4. Now take a piece of 6 cm and do the same with it.
5. Align the edges and add a 6-centimeter slice to a 5-centimeter.
6. We do the same with a piece of 7 cm. Then again 6 cm and 5 cm.
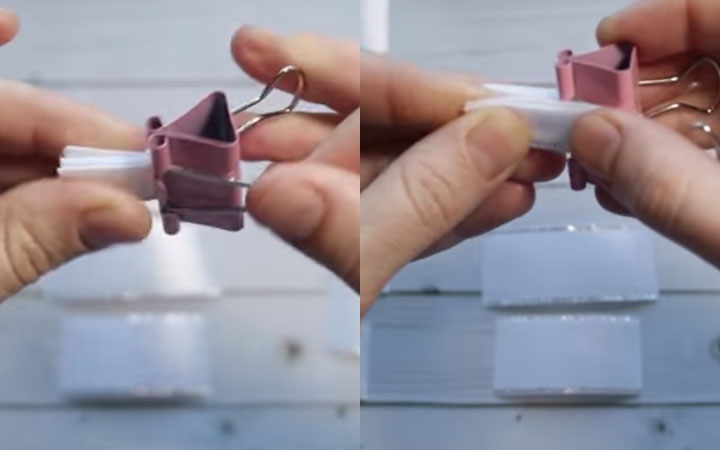
7. As a result of all actions, a five-leafed petal should appear, as in the photo. We seal its edges with a lighter.
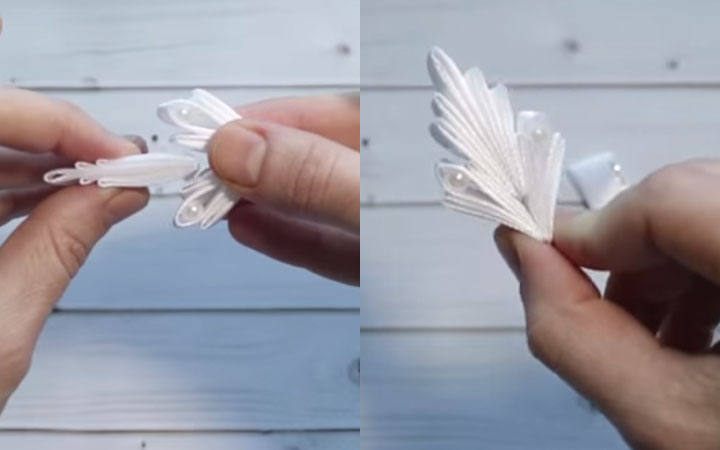
8. Similarly, we make two blanks of three-leafed petals.

9. Beads are planted in three-leafed petals, as in the photo.
10. Glue two three-leafed petals and glue a five-leafed leaf between them. Such blanks need 6 pieces.
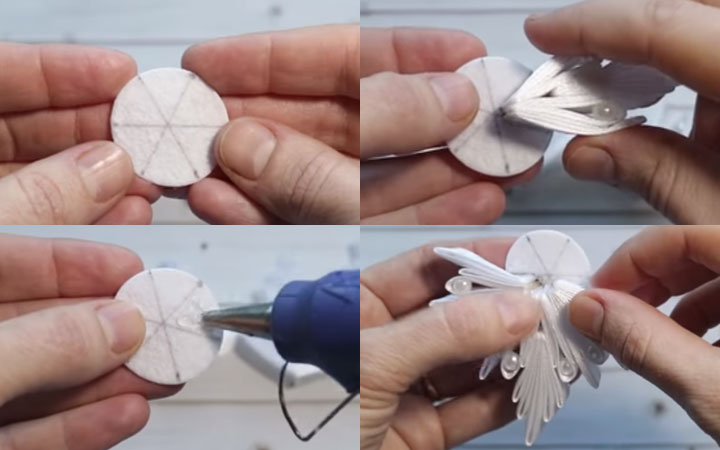
12. When all the blanks are done, take a cotton pad and draw 6 even shares on it.
13. Glue the blanks to each of them.
14. In the middle we stick a large bead, and small evenly distribute snowflakes around the perimeter. You can sprinkle silvery sparkles on top or paint individual elements with silver acrylic paint. Turn on imagination and create!
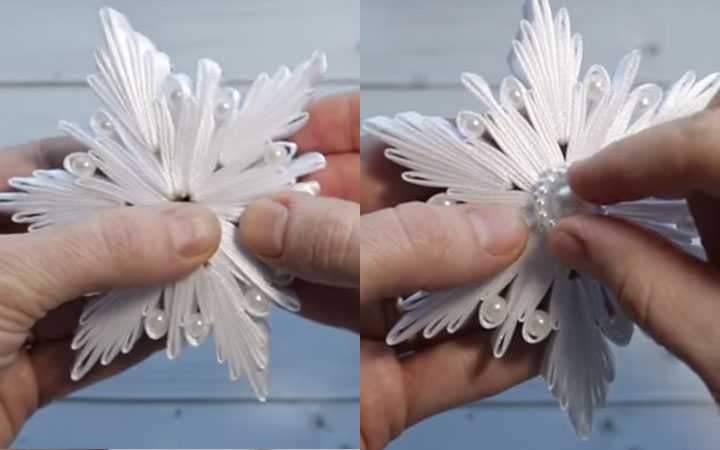
Kanzashi snowflake is ready! It takes about 1.5 hours. You can attach a finished snowflake to a hair hoop or make several crafts and decorate the apartment with them (hang from the ceiling, for example).

Some elements (for example, three-leafed petals) can be made from a ribbon of a different color. Then the snowflake will turn out more motley and bright. And if you reduce all sizes by 2 times, you get a very small craft that can be a great brooch for a New Year's outfit. Just do not forget from the wrong side to glue a special fastener with a pin on hot glue (sold in stores for creativity).
Having tried the kanzashi technique once, you will fall in love with this activity forever. With a good movie or your favorite music, you can do a lot of such crafts yourself. Lerita’s master classes show even more sophisticated ways to make petals, but they are very beautiful. Get inspired, create and try!
Also see the video instructions for creating other original kansashi decorations:
Read also:
- DIY Christmas wreaths for 2020
- DIY applications for the New Year 2020
- How to decorate a room for the New Year 2020
 (No ratings yet)