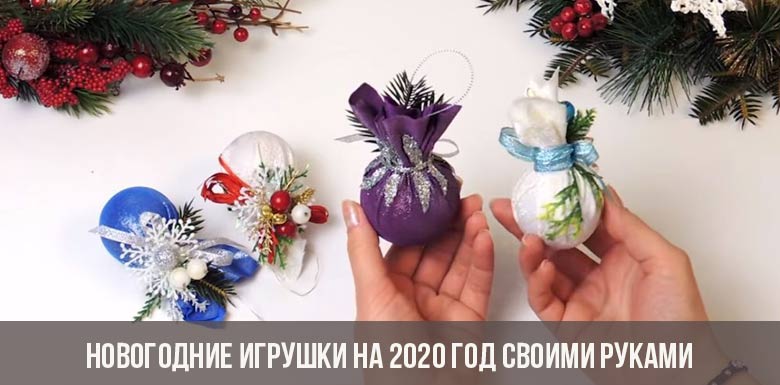
Despite the fact that shops have long been in short supply, many people still make New Year's toys with their own hands. Why? Firstly, this is a significant savings, because many crafts can be made from improvised materials. Secondly, unique products are obtained, which no one else has for sure. Thirdly, this is a pleasant pastime: you can do this with the whole family. Finally, fourthly, it is an opportunity to show your creative nature and make a toy of your dreams.
We offer several options for making DIY Christmas toys for the New Year 2020.
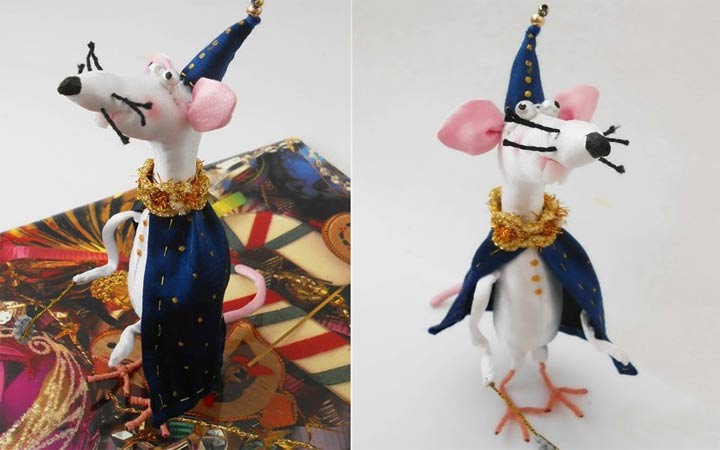
Funny rat
2020 is the year of the Rat, so you need to make this symbol for your own good luck.
To do this, you need the following materials and tools:
- white (or gray) and pink soft fabric (fleece, velveteen, velvet);
- stuffing for toys (cotton wool, synthetic winterizer);
- wire (not the thinnest, but not very thick: to bend your hands easily);
- brown acrylic threads;
- pliers;
- PVA glue;
- threads and needles for sewing.
It takes about 1 hour to make one such rat.
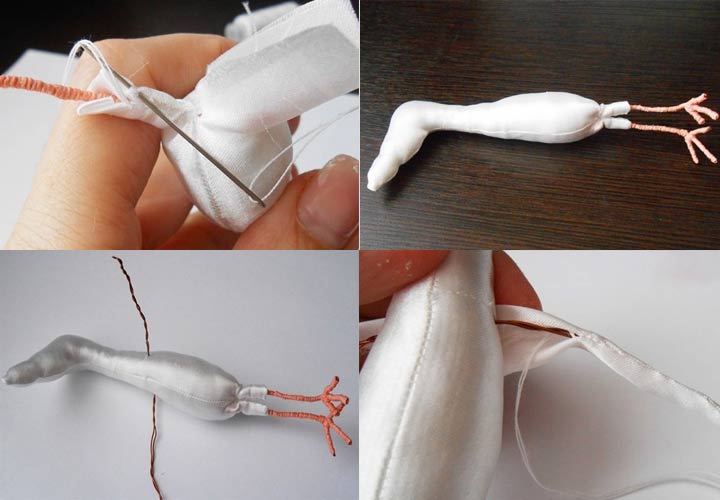
Step 1. We draw by hand a pattern of the body with the head. This is a funny rat, so the funnier it turns out, the more interesting. We leave a small rectangle near the body: we will sew the hind legs to it. We sew on the typewriter or manually seam back the needle of the body part, leaving the rectangle free (do not sew it). Turn the torso face out and stuff it with filler.
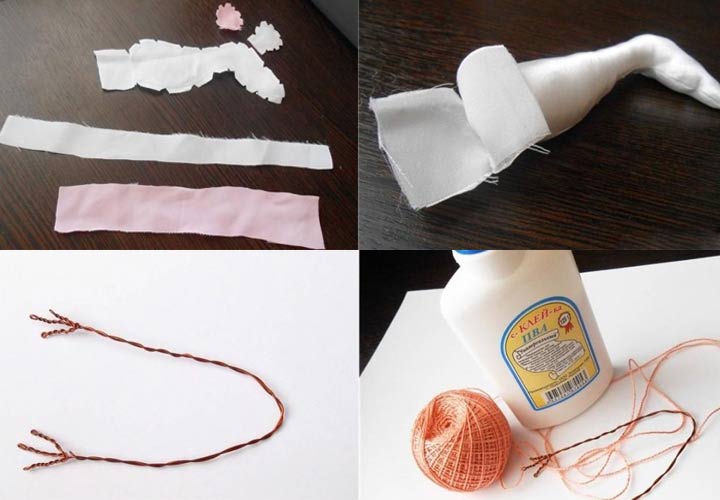
Step 2 Twist the legs from the wire. To twist the fingers we use pliers. If the wire is thick enough, you can not twist it, but simply bend it in the shape of paws. Wrap the wire with acrylic thread, gradually adding glue. The residues will then be easy to remove, as This is PVA glue. We insert the finished hind legs into an un sewn rectangle and manually sew it in the form of panties, at the same time fixing the wire.
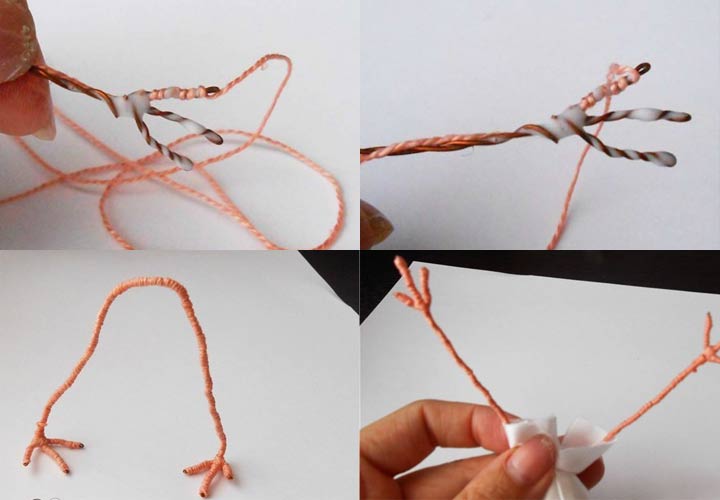
Step 3 The front legs are also made of wire. We pierce her body right through. Wrap the front paws with a white cloth (or you can use acrylic threads with glue).
Step 4 From the pink fabric we make the ears: ordinary circles. We sew them so that a fold forms in the middle. Similarly, we make a tail out of pink fabric. You can also take a pink lace.

Step 5 From pink fabric we make the basis for the eyes. The eyes themselves can be sewn from fabric, but these are very small details, so you can take some white beads and draw pupils on them with a marker. The antennae are ordinary strings, and the teeth are cut from a piece of plastic (a tube from shampoo, for example). We simply draw a nose with a marker.
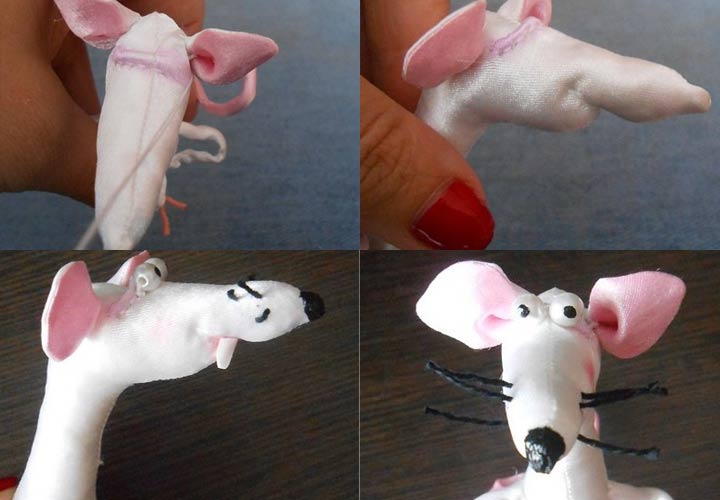
The rat is ready! At will, you can dress her up in something and get, for example, the Rat King, as in our example. A child will like such a Christmas toy and will also look good on a Christmas tree or at the head of a festive table.
Snowmen from light bulbs
To give a second life to the old bulbs, you can use them to make New Year's toys with your own hands. These are universal snowmen, which, if used carefully, can be preserved until the next New Year.
To work, you will need the following:
- old incandescent bulbs;
- a wire that twists easily;
- pliers;
- White paper;
- white threads;
- white felt;
- paste (can be cooked from starch, as in Soviet times);
- jute thread (thin twine);
- felt-tip pens;
- blue threads;
- hot glue;
- hair fixation spray;
- multi-colored paints.
It will take about 1.5 hours to make one snowman with your own hands.
Step 1. From the wire we twist the frame with hands. It is better to twist your arms from several layers so that they are more elastic.
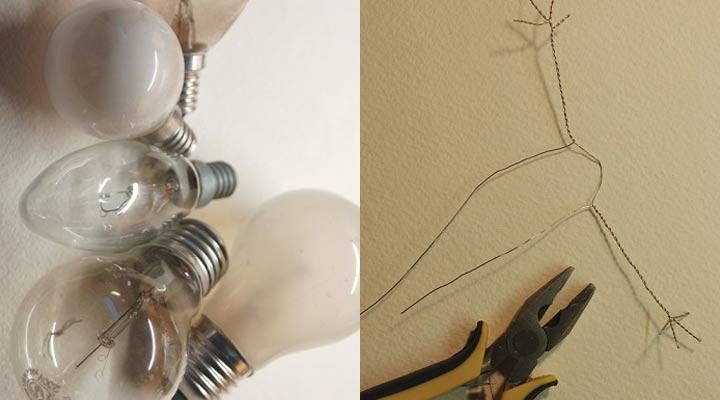
Step 2 We fasten the frame to the lamp base so that the snowman's hands are on both sides of it. The upper loop should remain free (see photo), as behind it, the toy will be hung on a Christmas tree or on a wall. On top we mask the base with a jute thread, which at the same time will fix the wire more tightly. We begin to cover the body of the snowman with paper. We do it in the style of papier-mâché: we grease the glass part of the light bulb with paste, and on top we stick pieces of paper.
Advice! If the paper is soft (like newsprint), you can stick it not in small pieces, but in its entirety, firmly pressing it to the glass.
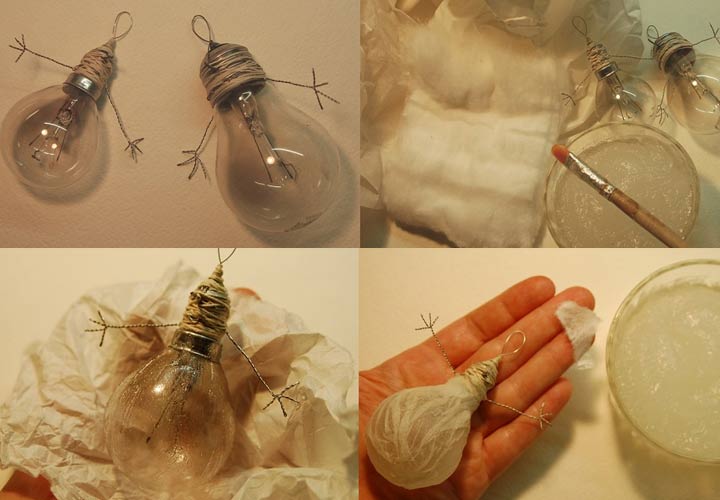
Step 3 While the paper is still wet from the paste, with the back of the brush or with another sharp object (a toothpick, for example) we dig holes (as in the photo). Similarly, glue paper onto the base with a paste to form a head. We twist the snowman's nose out of paper and glue it too.
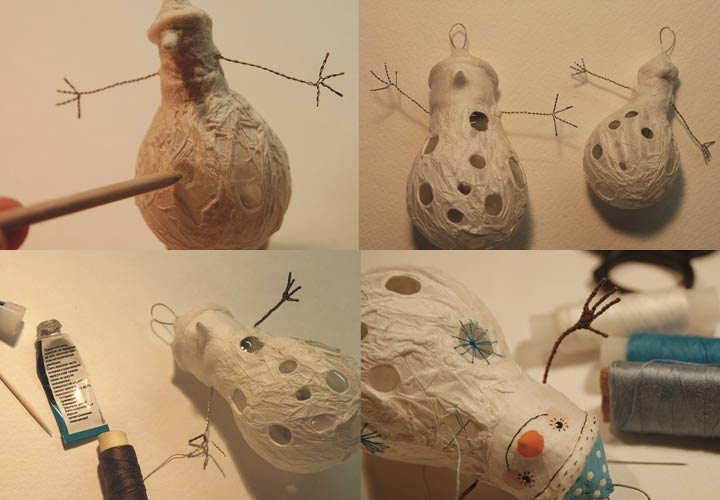
Step 4 After the snowman dries, cover it with hairspray. Hands-wire wrap a thread for beauty. To keep the thread more reliable, it is better to periodically lubricate it with PVA glue. In the transparent areas that we pick with a toothpick, we embroider snowflakes with blue threads. This is painstaking work that can be simplified by simply painting snowflakes with a blue felt-tip pen.
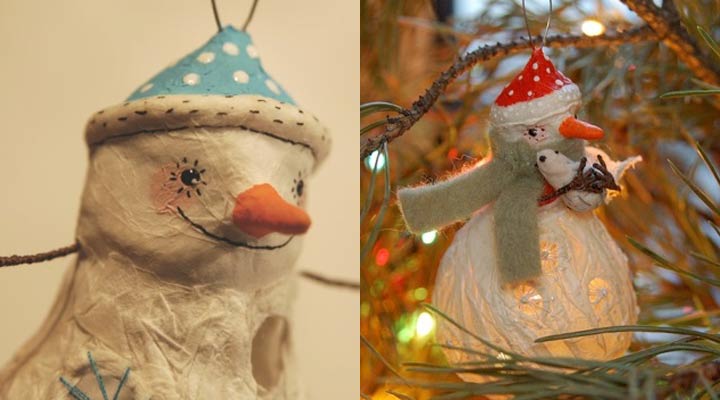
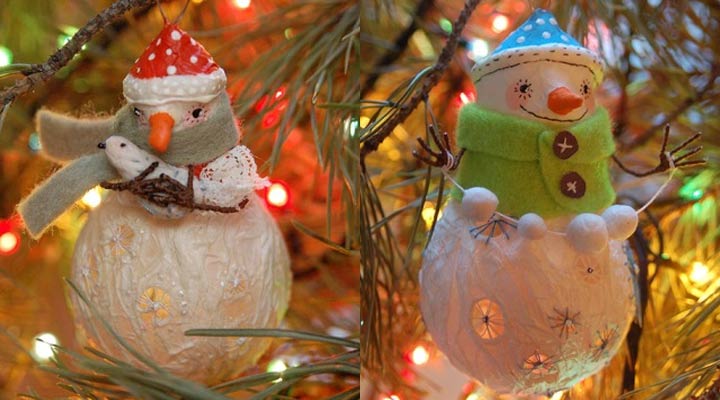
Step 5 Coloring a snowman: nose, eyes, smile, hat, etc.
Snowman is ready for the celebration of the New Year 2020! And we made it with our own hands.
In addition, you can tie a snowman a scarf from some fluffy fabric. You can also give him a small toy. The snowman’s hands are flexible, so he will easily “hold” any New Year’s attribute or “take” the snowman-girl by the hand.
Original Christmas balls
Not a single New Year is complete without a Christmas tree, and toys for decorating this forest beauty can also be made with your own hands.
To do this, we need the following:
- old Christmas balls (scratched, with a faded pattern, boring);
- foam balls from shops for creativity;
- beautiful shiny fabric (any that stretches at least a little);
- decoration elements: twigs, bows, beads, rhinestones, etc.
- hot glue;
- wire.
Such toys are made very simply and quickly. One ball takes about 15 minutes.
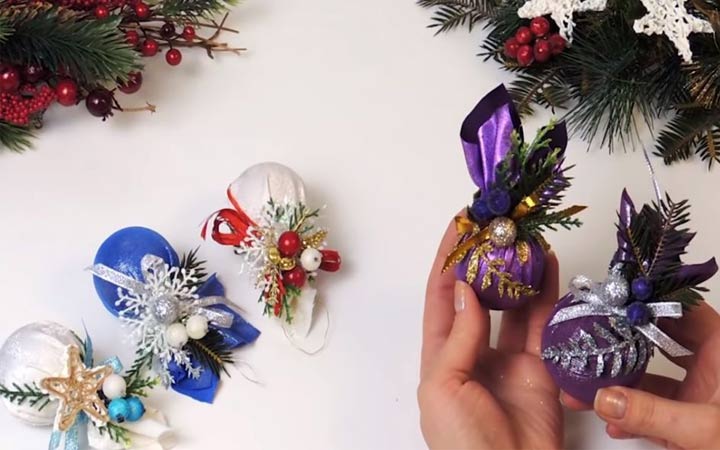
Step 1. We take an old Christmas ball and a small square piece of cloth. It is better to take a little more, then to trim, if there is too much.
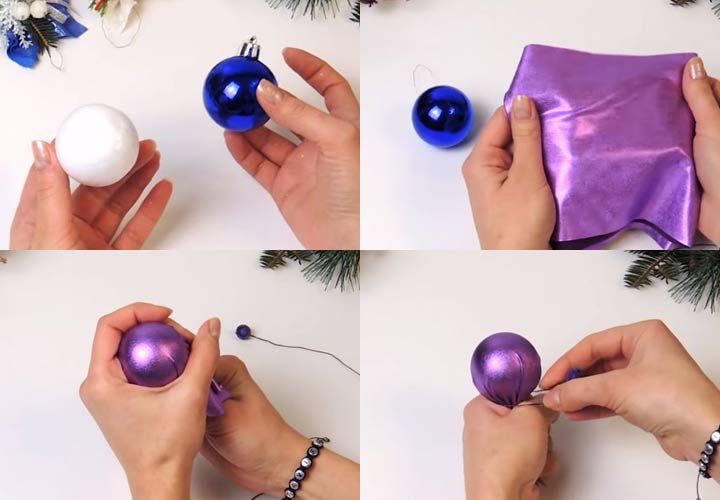
Step 2We put a cloth on the ball and fix it with a piece of wire (the ends of the wire can be decorated, but this is not necessary).
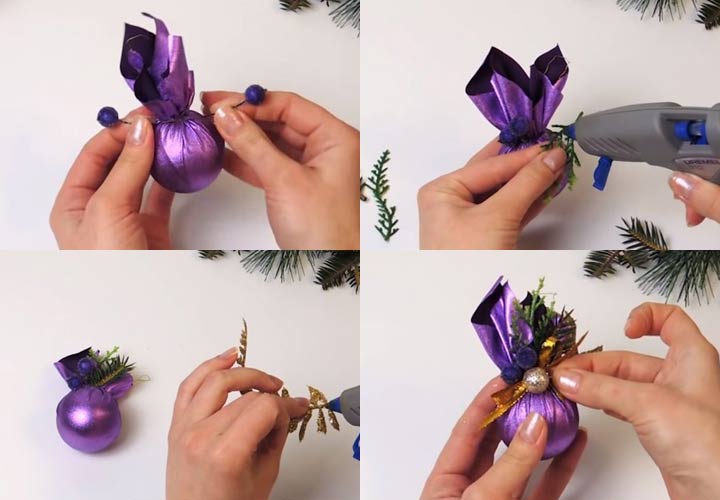
Step 3Almost ready. It remains only to decorate the ball with decor, fixing it with hot glue.
Making Christmas balls with your own hands is a huge scope for imagination. Each family member can make a ball that he likes in color and decoration. By the way, if polystyrene is used as the basis, and not the old Christmas ball, then such toys will serve more than one New Year, because they will not break. And when the decor gets tired, you can remove it, change the fabric to a new one and decorate with other elements.
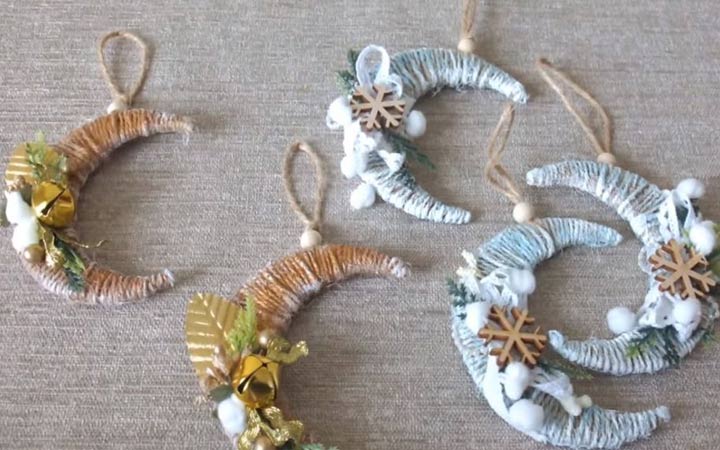
Christmas Toys - Crescents
We will dilute the ball ensemble a little and make with our own hands another interesting Christmas tree toy for the New Year - it will be an elegant crescent.
To work, you will need the following materials and tools:
- cardboard or thin sheet of plywood;
- jute thread (thin twine);
- PVA glue;
- hot glue;
- scissors;
- sponge for washing dishes;
- acrylic paints;
- decor: ribbons, pompons, wooden jewelry or buttons, beads, rhinestones, artificial coniferous branches, etc.
If we take into account the crescent cutting out of plywood (it is better to entrust this work to a man), then it will take about 2 hours to make one such toy. If you take a ready-made template or make it from several layers of cardboard, it will take about an hour.
You can also search for wooden blanks in the form of crescents in shops for creativity.
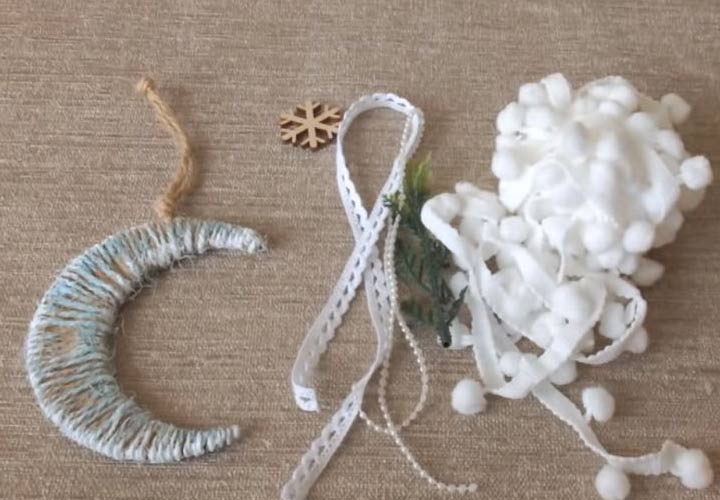
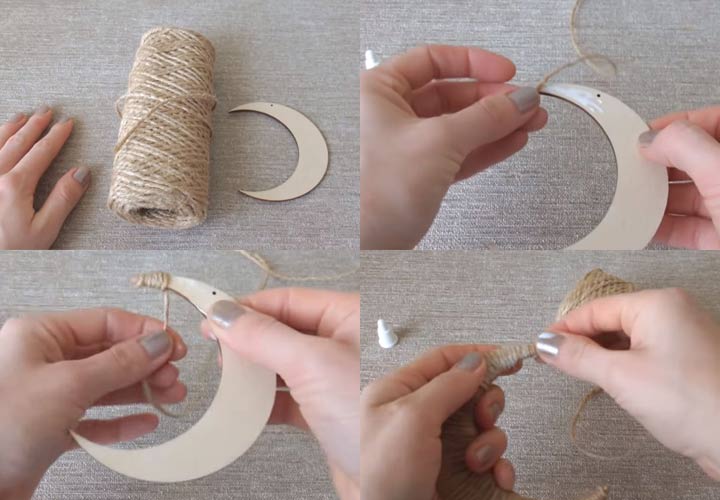
Step 1. We coat a small portion of the workpiece with PVA glue and begin to wrap it tightly with jute thread. Gradually we make it to the very end, adding glue.
Advice! Do not smear the entire part at once, as glue will dry quickly.
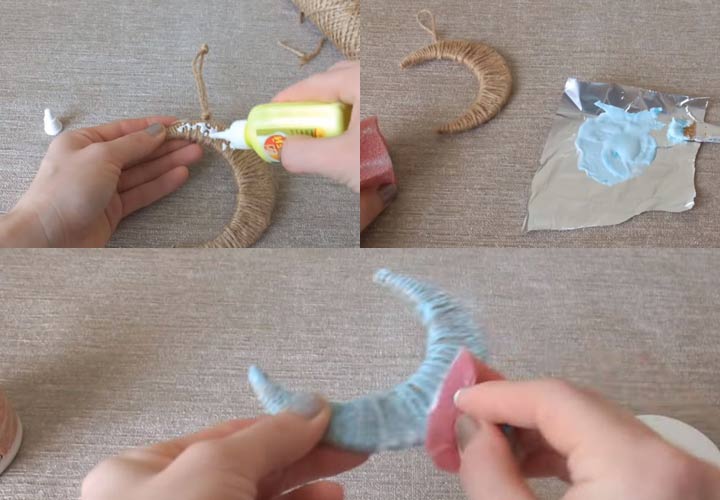
From a jute thread we make a loop for which a New Year’s toy will be suspended from a Christmas tree. In addition, we coat the crescent with glue from the outside and distribute it along the threads so that they “clutch” even better.
Step 2 We prepare a solution of acrylic paint of any color. In our example, blue. Cut a small piece from the sponge - it will be a brush. Sponge the crescent moon. The edges of the crescent are similarly smeared with white acrylic paint to create a beautiful color transition effect.
Step 3 You can decorate a toy. We glue hot elements to it in a random order.
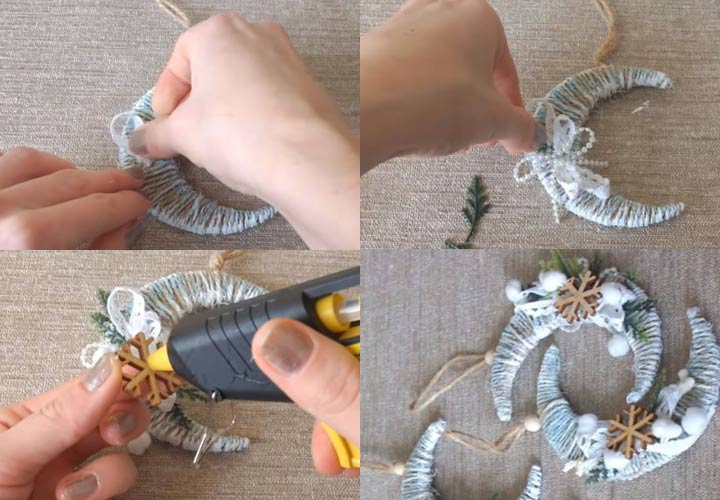
The crescent is ready! If there are sparkles, you can additionally cover the toy with them so that it shimmers beautifully and flickers in the light of garlands. You can also decorate it with artificial snow.
There are no boundaries for fantasy: you can use a variety of shades. For example, golden crescents also look very beautiful.
Nobody will definitely have such Christmas toys, unless, of course, you want to give them to your friends and relatives. And you’ll save a lot of money, because most of the materials for making toys for the New Year will be at home.
Also watch master classes in the video format for making unusual New Year's toys:
Read also:
- How to Decorate a Christmas Tree for Rat's New Year 2020
- DIY 2020 New Year Decorations
- Do-it-yourself needlework for the New Year 2020

 (1 ratings, average: 4,00 out of 5)